• Home
  • FAQ’s
  • Contact
    • About Me
    • Policies
      • Privacy Policy
      • Disclaimer Policy
      • Terms & Disclosures
  • Privacy Policy
  • Terms & Disclosures
    • Facebook
    • Instagram
    • Pinterest
    • Twitter
    • YouTube

Blooming Homestead

  • Gallery
  • DIY/Crafts
  • Home Decor
  • Recipes
    • Breads
    • Desserts
    • Dips/Appetizer
    • Main Dishes
    • Soups/Sandwiches
  • printables
  • holidays
    • Valentines
    • St. Patrick’s Day
    • Easter/Spring
    • 4th of July
    • Halloween
    • Fall/Thanksgiving
    • Christmas
  • Organization
    • Home Binder Printables
    • Printable Calendars
    • Cleaning Tips & Tricks
    • Organization Tips

DIY Wood Carrots

in DIY/Crafts, Easter Ideas on 18/03/15

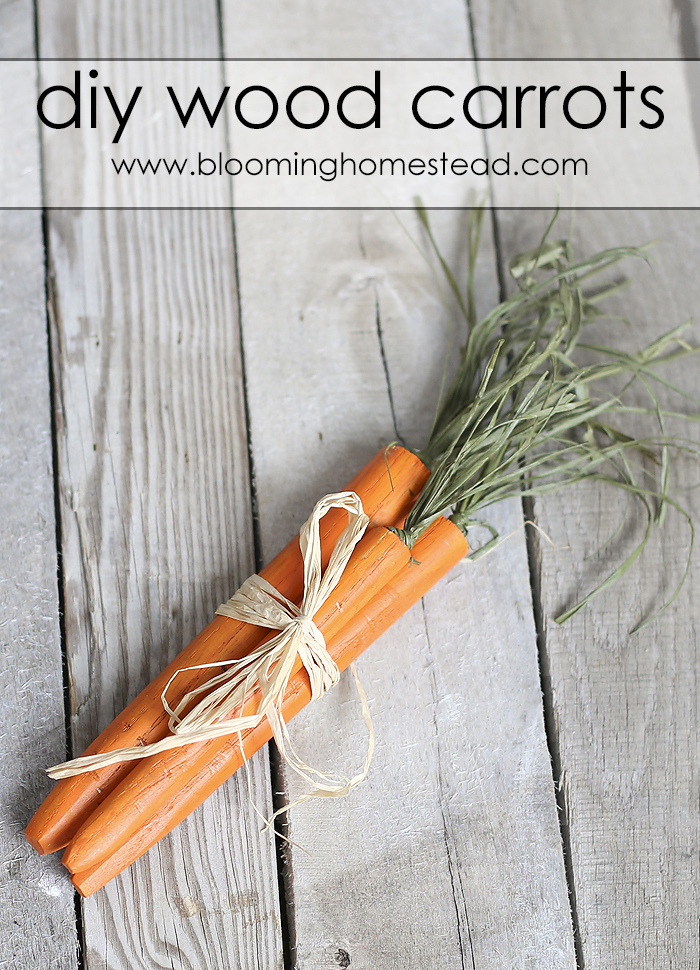
You know how I love a little diy project and these DIY Wood Carrots are no exception. These are so easy to make and they turned out so cute. 
DIY Wood Carrots Tutorial-easy diy project
 
Here are the supplies you’ll need:

  • Wood baluster (tapered stair railing-I used 36″ unfinished oak)
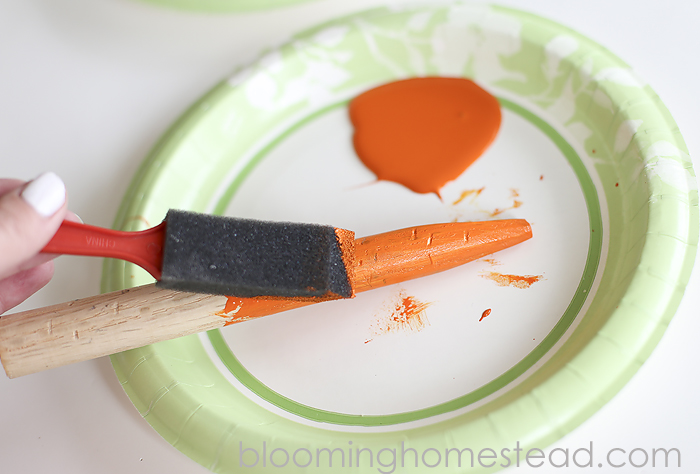
  • Orange craft paint and brush
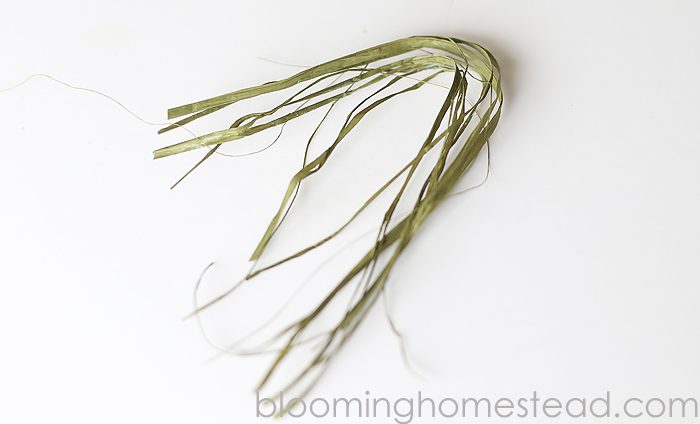
  • Green Raffia
  • Glue glun & glue sticks
  • Saw (I used a jigsaw)-not pictured- You can also have the hardware store cut it for you if you don’t have a saw.
  • Screwdriver and hammer-not pictured
  • Electric Sander or Sandpaper-not pictured

DIY Wood Carrots Tutorial-easy diy project
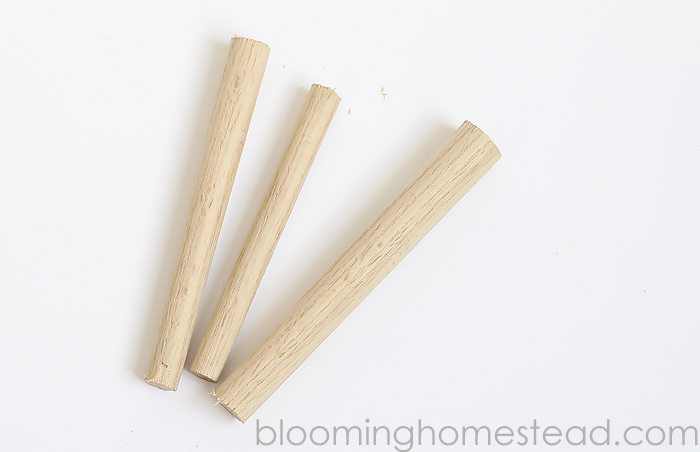
First off, you’ll want to cut your baluster into sections. I used only the tapered part and cut it into 3 three sections. You can cut the carrots into however large or small you want. Mine were roughly between 6-8″ long for each carrot so I was able to get 3.(I discarded the top un-tapered part).
DIY Wood Carrots Tutorial-easy diy project
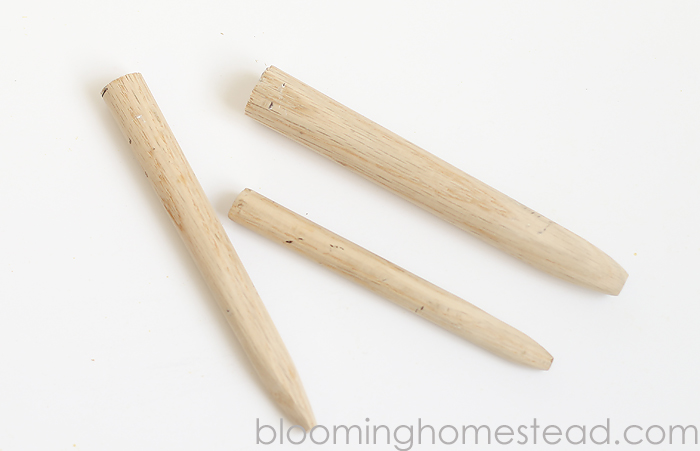
Next off, you’ll want to sand down the smaller ends of your carrots for a rounded look. I used an electric sander which makes things go a lot quicker. Next, I used my screwdriver and hammer to hammer down lines into the carrot in a random, haphazard fashion. This just adds some dimension and a realistic touch to the carrots, and is completely optional of course.DIY Wood Carrots Tutorial-easy diy project
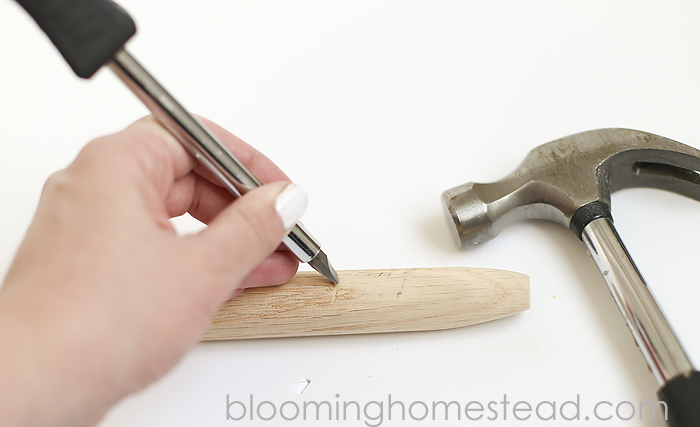
Now its time for paint.
DIY Wood Carrots Tutorial-easy diy project
While your carrots are drying, you can make the raffia stems you’ll glue onto the ends of the carrots. Just take a few strands of raffia, fold in half, now tie a knot in the very end.
DIY Wood Carrots Tutorial-easy diy project
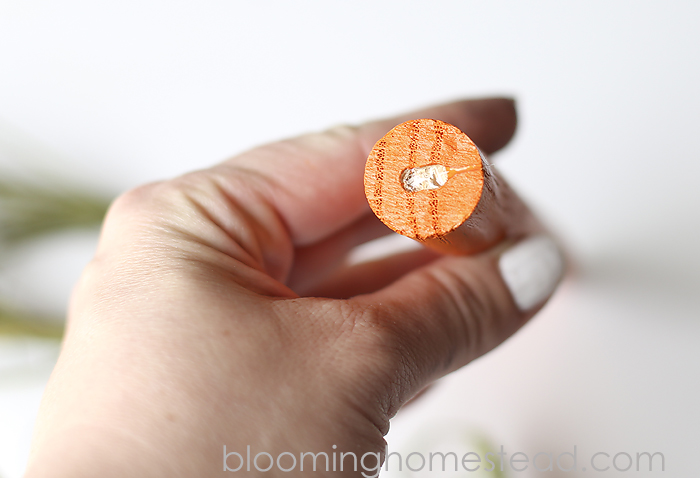
You’ll glue this knotted end onto the carrot. Trim down the excess hanging after the knot to make it adhere better to the carrot.When the carrots are dry, you can glue on the stems. I used my screwdriver (and a random screw) to make a slight hole end the end of my carrot. This is optional, but it helps have a pocket for the hot glue so it makes the stem look cleaner. 🙂
DIY Wood Carrots Tutorial-easy diy project 
DIY Wood Carrots Tutorial-easy diy project
 
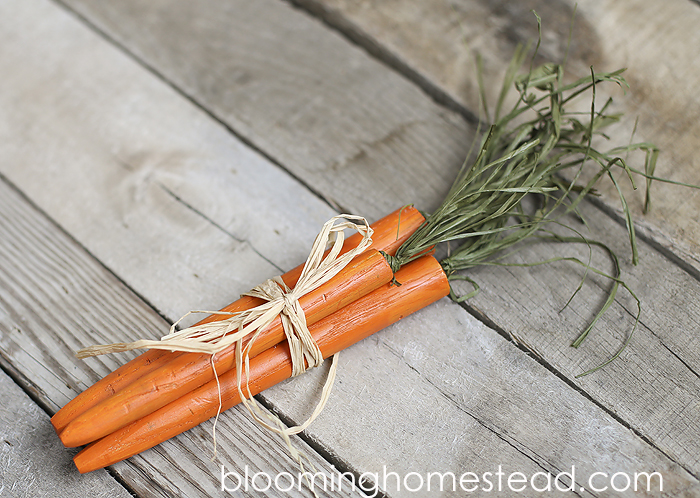
And that’s it. Super cute and easy DIY Wood Carrots. I link to these parties here.
 
This post was originally posted on I heart Nap Time 4/5/2014

9 Comments

About Marie

Marie is the author of Blooming Homestead and loves to share her latest home decor ideas, crafts, recipes, home organization tips, and diy projects.

« DIY Birthday Countdown Boxes
Creative Collection Link Party »

Comments

  1. Vicki at EntriWP.com says

    March 19, 2015 at 5:59 am

    So cute. Love these carrots.

    Reply
  2. Natashalh says

    March 19, 2015 at 9:44 pm

    So cute! I love how they have those little “just peeled” nicks. I can’t believe Easter is already only a couple weeks away!

    Visiting from What to Do Weekends. =)

    Reply
    • Marie says

      March 23, 2015 at 9:17 pm

      Yes, I love that little bit of texture. 🙂

      Reply
  3. Amanda says

    March 20, 2015 at 7:16 am

    These are so adorable! I love the primitive look!

    Reply
  4. Liz @ Liz on Call says

    March 20, 2015 at 2:48 pm

    These are so awesome! I need to make some of my own now!

    Reply
  5. Katherines Corner says

    March 20, 2015 at 7:50 pm

    this is so darn cute! Pinned to my lets get crafty board. Thank you for sharing at the Thursday Favorite Things blog hop xo

    Reply
  6. Linda says

    March 21, 2015 at 9:52 am

    I LOVE these carrots. PInned to my Easter board. Best wishes, Linda @Crafts a la Mode

    Reply
  7. Joy @ Joy Love Food says

    March 27, 2015 at 8:26 am

    These are so cute!

    Reply

Trackbacks

  1. Great Ideas -- 20 Easter Decor Projects! says:
    March 22, 2015 at 1:34 am

    […] DIY Wood Carrots @ Blooming Homestead  […]

    Reply

Leave a Reply Cancel reply

Your email address will not be published. Required fields are marked *

Welcome! I'm Marie an avid crafter with a passion for home decor and organization! I am so glad you are here!

  • Facebook
  • Instagram
  • Pinterest
  • Twitter
  • YouTube

Popular Posts

Follow me on Instagram

[instagram-feed]
Friends of Pfister You blog. You Profit. Sign up for SocialSpark!
“Blooming Homestead is a participant in the Amazon Services LLC Associates Program, an affiliate advertising program designed to provide a means for sites to earn advertising fees by advertising and linking to amazon.com."

Copyright © 2025 · glam theme by Restored 316

Copyright © 2025 · Glam Theme on Genesis Framework · WordPress · Log in

  • Home
  • Privacy Policy