I love adding in touches of Spring to my home. This year has been a little more tricky with my commitment to stop buying more supplies and decor, and try to re-use what I have. Well, one morning after breakfast I was looking at our empty OJ container and I thought, “I love the shape of this”, next thing I know I was ripping off the labels and priming it!

First off, rip off the sticker and wash it out.

I took my metal cutters (only thing that would cut it) and cut off the top where the lid screws on. I was going to sand this to be a cleaner edge, but I got lazy and figured it wouldn’t be that noticable.
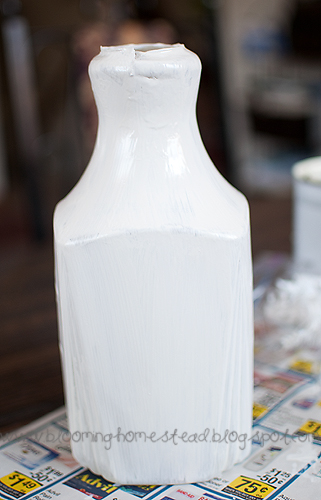
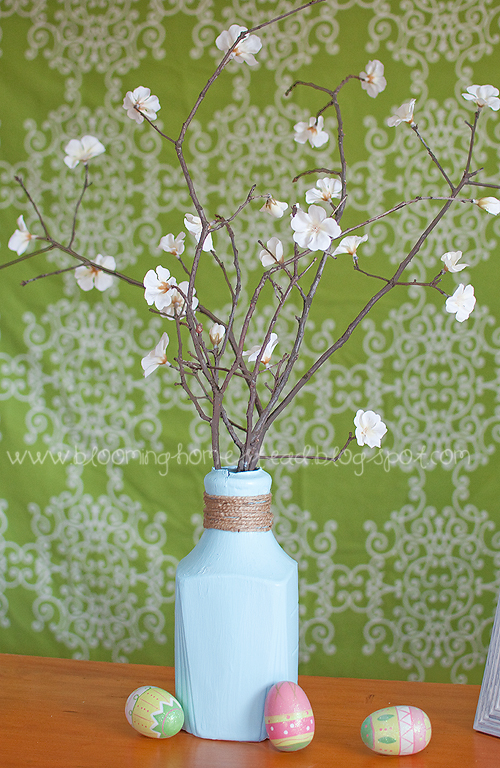
Next off came my primer. I used what I had on hand which was a kilz oil based primer. I coated it a few times. After that I got my blue paint sample I had for a spring sign I coated a few coats on. It still felt like it needed something so into the craft room I went hunting.

Ah…perfect!

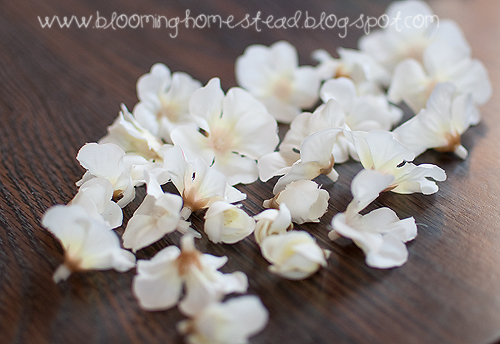
Next up I needed vase filler and decided to go Mathew Mead style with blossom branches. I went out the backdoor about 2 steps on the patio and found my branch with several twigs to use!

I broke off a few of the small branches and went inside to find some blossoms.

I had this stem as a leftover to a floral arrangement I made. I thought it would be perfect so off came the blossoms. Just a light tug brought them off their stems.
I just glued them on randomly 1 by 1 with hot glue. Most of them fit onto the new spring buds from the fallen branch so they were quite secure.

Super Easy and I love the final product all put together and Spring-y!
P.S. I have some adorable free Spring Printables coming up!


This is pretty!!! Great tut and great photos!
That looks gorgeous! If I had that in my house, I would smile every time I saw it. I might have to work on creating something like that. Thanks for the inspiration!
this is what I should have done instead of my tedious and painstaking attempt at crepe paper cherry blossoms!! love it.
I’m guzzling orange juice as we speak, lol. Great idea.
Don’t you just feel so impressed with yourself when you make something awesome like that?? You are a smart gal!
Thanks so much for the comments. It was fun to make and transform a simple plastic bottle!
Totally awesome! I just found your blog and I can’t wait to see what you come up with next!
Cute project. I never would have guessed that it was a juice container.
Hi I know this is way late comment but only just found your blog I LOVE IT. This jar is so cute and cheap
Thanks so much! This has become my go-to vase. I love how it turned out.
I did this and I wasn’t fond of the cut top so instead of sanding, out came my embossing heat gun. I gently melted the plastic until smooth. then I proceeded with the rest of the steps. This was so cool!