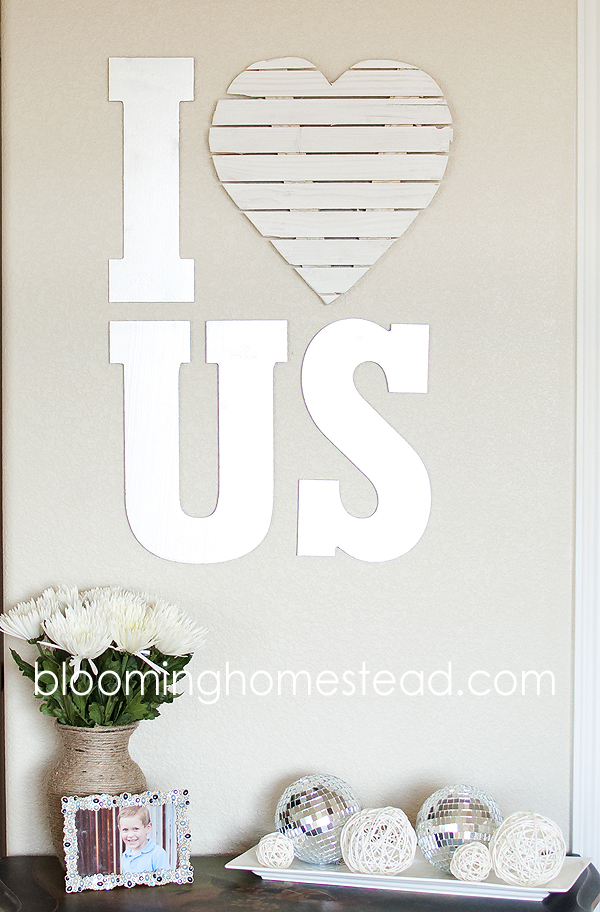
We have been working on a master bedroom revamp for the past year and I have been on the hunt for the perfect accents. (Things got a little delayed with our baby girl) I knew I wanted a fun graphic accent on a small wall in our bedroom and I came up with this fun DIY Wall Art.
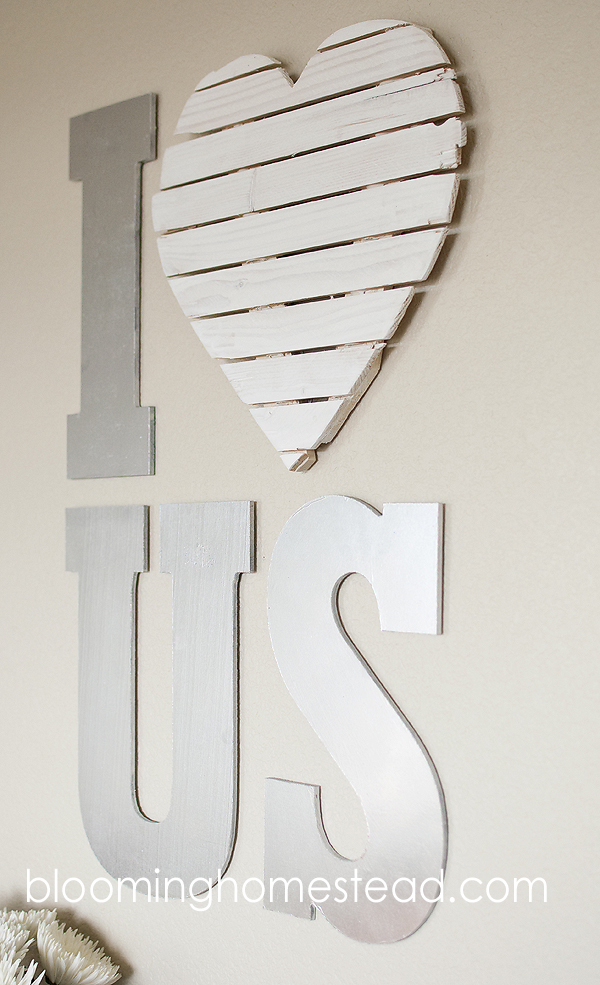
It is always fun to use reflective items such as metallic and mirrors with naturals such as burlap and jute. My favorite lamps are reflective mercury glass with burlap shades and I wanted this accent wall to complement those lamps. To start I purchased 12” tall mdf letters and went to work on a creating a heart out of wood strips. I don’t own a lot of tools so this art is very simple!
Supplies:
- 5 lattice strips cut into 3rds (may need more or less depending on size of heart you make)
- liquid nails or nail gun
- cardboard spacers
- paper heart to use as template
- paint & brush (white craft paint and metallic spray paint)
- MDF letters (I used 12″ tall letters)
- jigsaw & sander or sandpaper
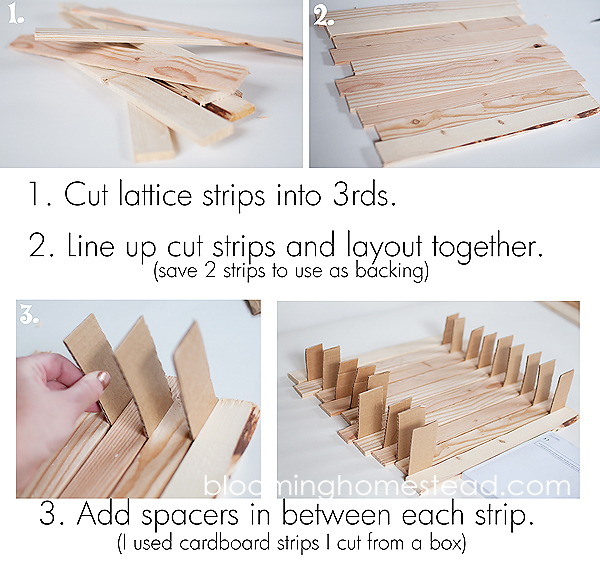

4. Use the 2 strips you saved to bind all the spaced strips together. I used a “V” shape so that when I cut it into a heart each strip would be supported.
5. Now it’s time to attach the backing strips. You can easily nail them together, but if you’re like me and don’t have a nail gun you can use liquid nails. I just attached it to the back of the strips and pressed it down to adhere it.
6. Next I brushed some extra glue around the spaced strips to make sure it would be secure.
7. After you have it glued, you can use something heavy to help hold the strips down while they dry. (I used weights)
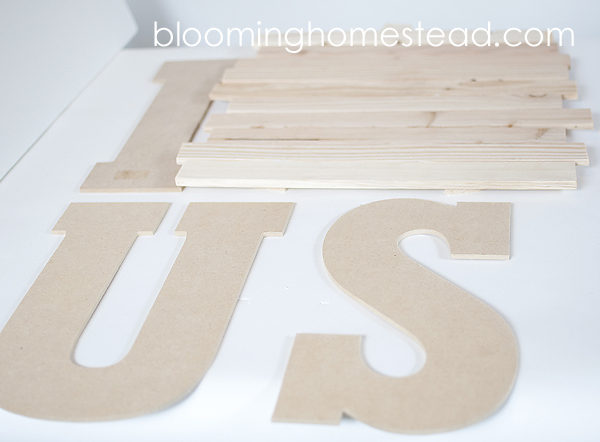
8. After the liquid nails dried completely, I took my mdf letters and lined up my “art” so I knew what size of heart to cut out.
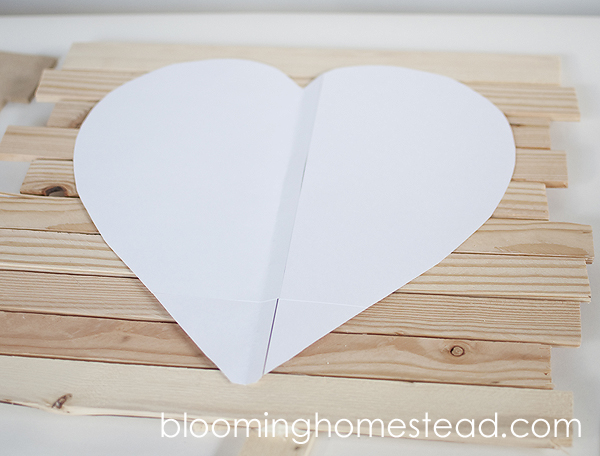
9. I cut a paper heart template for accurate sizing.
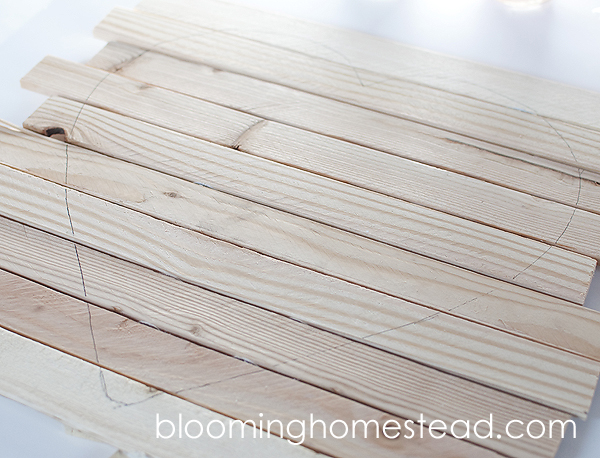
10. Trace around the paper heart onto the wood so you know where to make your cut. Now you’re ready to cut! (I used my jigsaw) After I cut out the wood heart, I used my sander to sand the edges and smooth it down a bit to get it ready to paint.
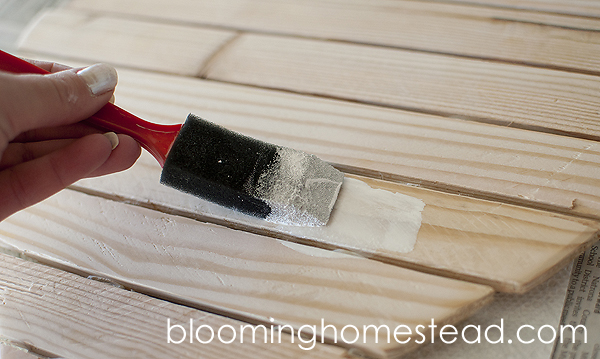
For the heart, I decided to do a “white wash” technique which is basically watered down paint that allows the wood grain to show through.
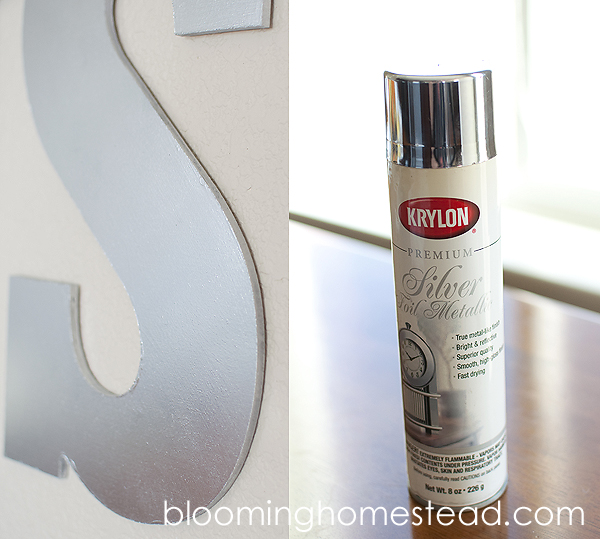
For my MDF letters, I used a metallic spray paint that looked great applied although it was hard to photograph because of how well it reflected! I knew that I wanted something light and reflective. Once my letters were all dried I attached them to the wall with command strips. And there ya have it!
This post was originally posted on I Heart Naptime on 1/24/13.
I join these fabulous link parties each week: I heart naptime, Under the table and dreaming, Not just a housewife, The Project Queen, , Sumos Sweet Stuff, The Kurtz Corner, Ginger Snap Crafts, Laugh, Love, Craft, Clean and Scentsible, Somewhat Simple, The Shabby Creek Cottage, The Shabby Nest, Tatortots & Jello, Simply Designing, Chic on a Shoestring, ,Someday Crafts, The Idea Room ,Between U and Me, Positively Splendid, Raising 4 Princesses , One Stop Shoppe, Its Overflowing, The D.I.Y. Dreamer ,Serendipity & Spice, ,Crafty blog stalker , CSI Project, 36th Avenue, Real housewives of Riverton ,The rustic pig , Clever Chicks Blog Hop , Skip to My Lou ,


I love, love, love your new site design!! It’s beautiful. 🙂
Thank you Diana!
Looks awesome.
Thanks!
Is there any chance I can purchase an I love us wall decor from you?
Thanks so much. I have been thinking of switching things up, if I decide to sell it I will let you know!
This is adorable! Don’t sell it. =)