• Home
  • FAQ’s
  • Contact
    • About Me
    • Policies
      • Privacy Policy
      • Disclaimer Policy
      • Terms & Disclosures
  • Privacy Policy
  • Terms & Disclosures
    • Facebook
    • Instagram
    • Pinterest
    • Twitter
    • YouTube

Blooming Homestead

  • Gallery
  • DIY/Crafts
  • Home Decor
  • Recipes
    • Breads
    • Desserts
    • Dips/Appetizer
    • Main Dishes
    • Soups/Sandwiches
  • printables
  • holidays
    • Valentines
    • St. Patrick’s Day
    • Easter/Spring
    • 4th of July
    • Halloween
    • Fall/Thanksgiving
    • Christmas
  • Organization
    • Home Binder Printables
    • Printable Calendars
    • Cleaning Tips & Tricks
    • Organization Tips

How to make a Vintage Looking Sign

in DIY/Crafts, Home Decor on 16/08/15

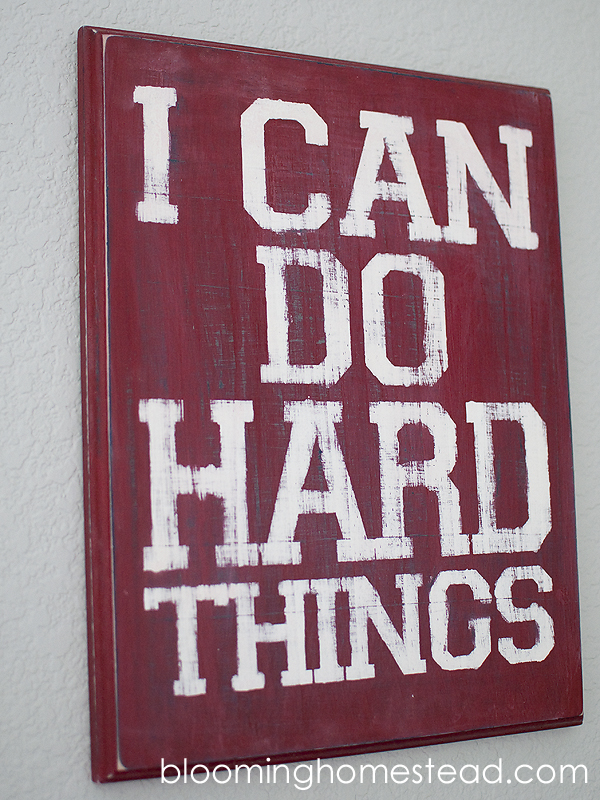
I often receive emails about making signs and today I’ve got another fun diy for you. We’ll go step by step and learn How to make a Vintage Looking Sign. I use a simple paint layering technique that helps you achieve that beautiful aged look and you won’t believe how easy it is.
Step by step tutorial showing how easy it is to make a vintage looking sign. Anyone can do it and I love that I can custom my own vintage decor!
 
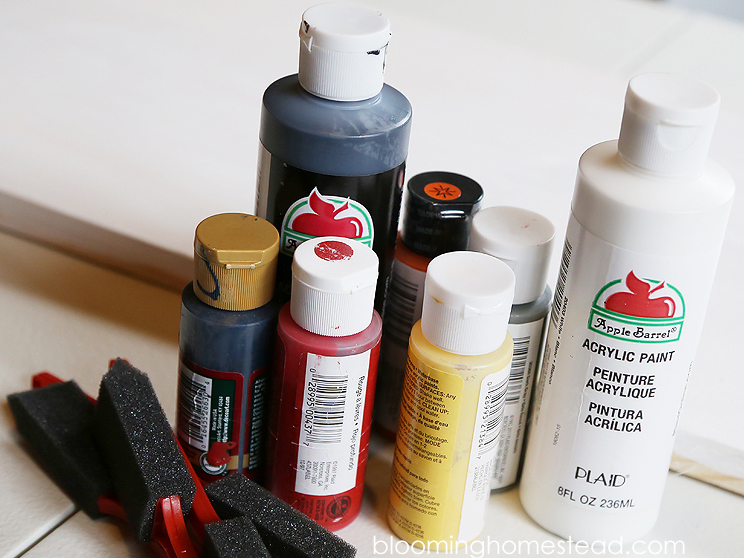
Here are the supplies you’ll need:

  • various colors of paint…I use acrylic
  • stencil
  • pencil
  • brushes
  • wood 
  • hanging hardware
  • sandpaper

Step by step tutorial showing how easy it is to make a vintage looking sign. Anyone can do it and I love that I can custom my own vintage decor!
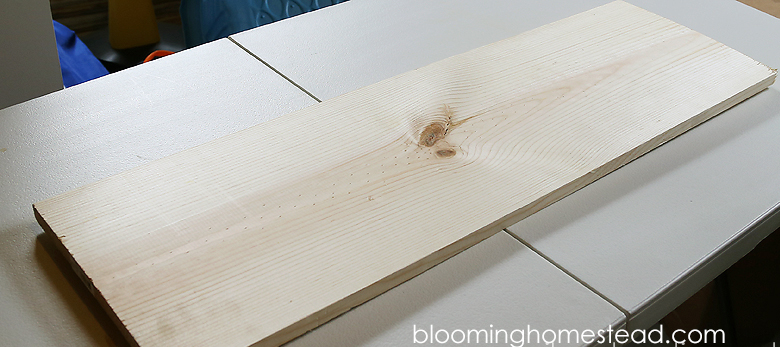
First off, you’ll want to prep your wood. I do a light sanding.
Step by step tutorial showing how easy it is to make a vintage looking sign. Anyone can do it and I love that I can custom my own vintage decor!
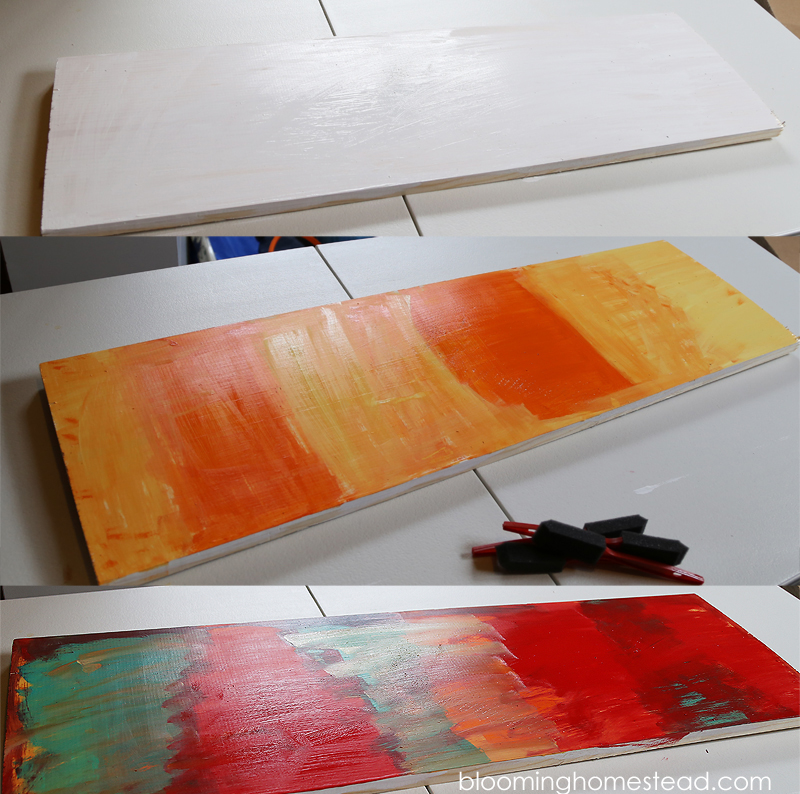
Now its the magical part, you’ll start layering on different paint colors. I do this in a very haphazard fashion, combining different colors and tones together. Let each layer dry before proceeding to the next layer. 
Step by step tutorial showing how easy it is to make a vintage looking sign. Anyone can do it and I love that I can custom my own vintage decor!
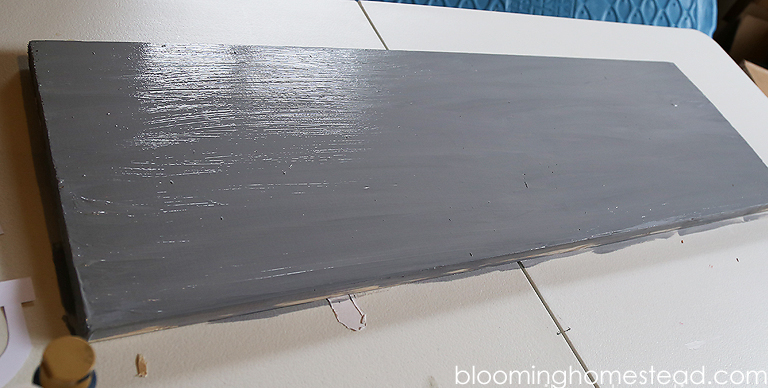
When all your paint layers are dry, you’ll paint on your main background color. For my sign, I went with a light grey.
Step by step tutorial showing how easy it is to make a vintage looking sign. Anyone can do it and I love that I can custom my own vintage decor!
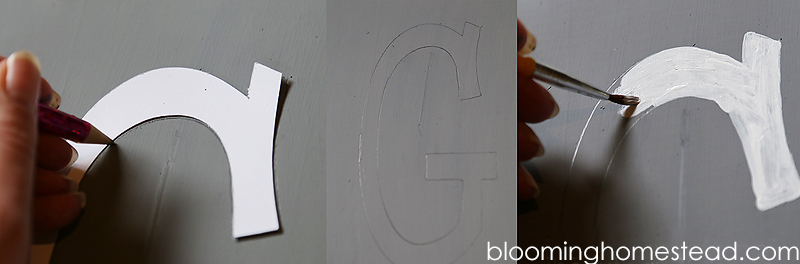
After your main layer is dry, it is time to paint the typography. You can freehand or create a stencil for your lettering. I used card stock letters cut out with my silhouette because I do not have any freehand ability. 🙂 I traced the letters on lightly with a pencil and then painted them in with white paint.
Step by step tutorial showing how easy it is to make a vintage looking sign. Anyone can do it and I love that I can custom my own vintage decor!
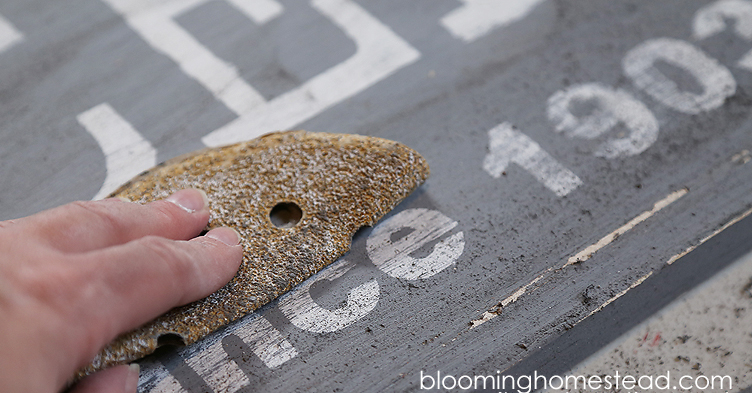
You will probably want to do at least two coats of paint on the lettering depending on the color of background you choose. After all your lettering dries, you’ll start distressing with sandpaper. At this point, that beautiful rainbow of colors you painted will start to show through. Be careful you don’t oversand, removing the lettering from visibilty. At this point it is a matter of personal preference how distressed you want your sign to be.
Step by step tutorial showing how easy it is to make a vintage looking sign. Anyone can do it and I love that I can custom my own vintage decor!
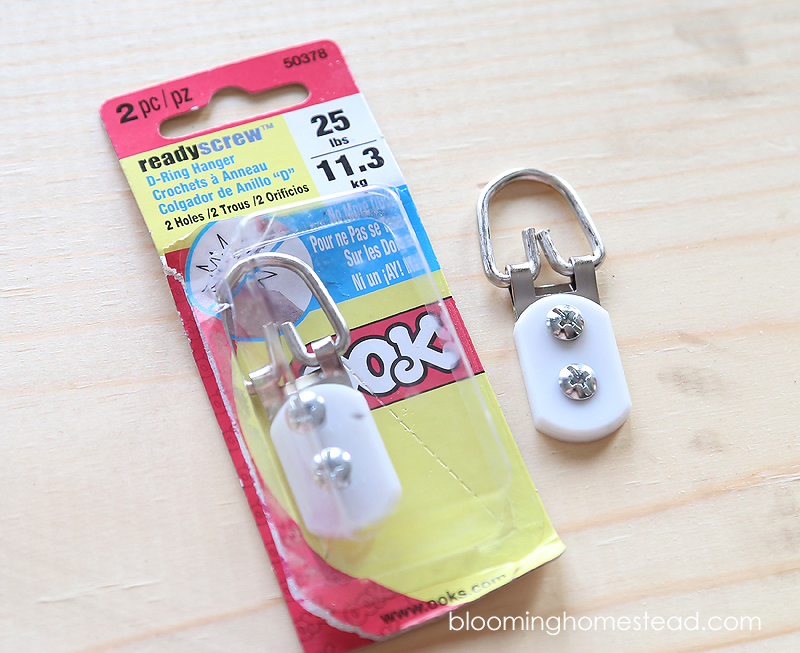
When it is all done, vacuum or wipe off sanding dust and you can coat it with poly if you choose. Now you’ll add hanging hardware to the back (these are my favorite) and you’re all done!
Step by step tutorial showing how easy it is to make a vintage looking sign. Anyone can do it and I love that I can custom my own vintage decor!
I love how it turned out!
Step by step tutorial showing how easy it is to make a vintage looking sign. Anyone can do it and I love that I can custom my own vintage decor!
Looking for more inspiration? Check out these other fabulous DIY’s:
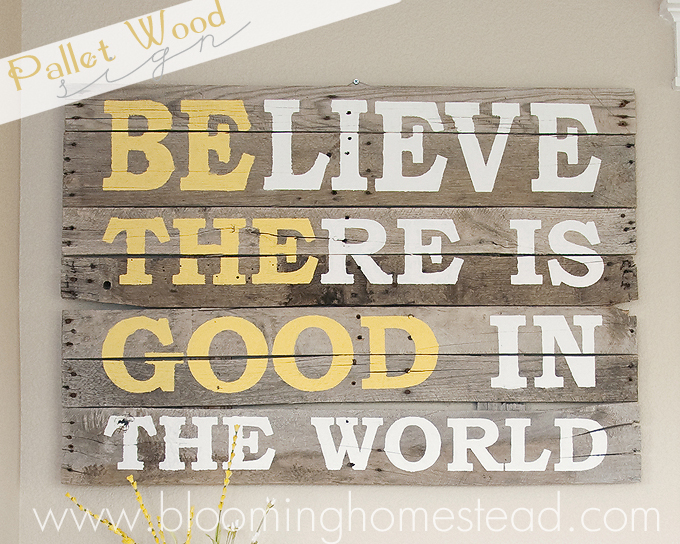
Inspiration DIY Pallet wood sign by Blooming Homestead
Pallet Wood Sign
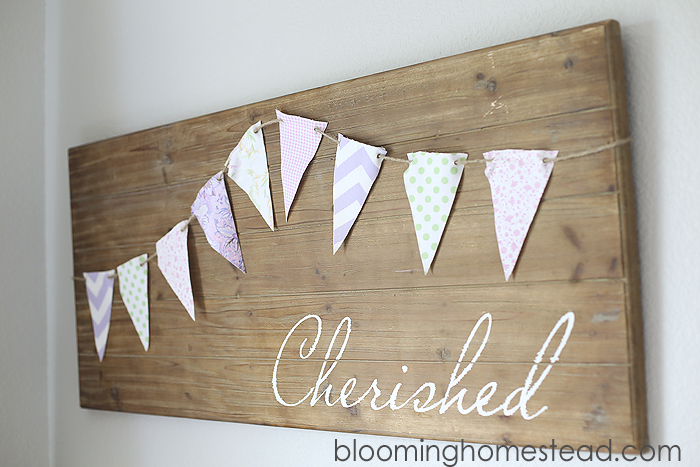
Cherished Wood Sign Tutorial
Distressed sign by Blooming Homestead
Vintage Sign
I link to these parties here.
This post was originally shared on I Heart Nap Time 1/20/14.

3 Comments

About Marie

Marie is the author of Blooming Homestead and loves to share her latest home decor ideas, crafts, recipes, home organization tips, and diy projects.

« Creative Collection Link Party
Easy Sew Wristlets »

Comments

  1. Dori says

    August 19, 2015 at 12:28 am

    The idea is great !

    Reply
  2. Mindy says

    October 3, 2015 at 9:13 pm

    Great ideas! I LOVE that Groceries sign. Your kitchen is gorgeous btw!

    Reply
    • Marie says

      October 7, 2015 at 11:35 pm

      Thanks so much Mindy!

      Reply

Leave a Reply Cancel reply

Your email address will not be published. Required fields are marked *

Welcome! I'm Marie an avid crafter with a passion for home decor and organization! I am so glad you are here!

  • Facebook
  • Instagram
  • Pinterest
  • Twitter
  • YouTube

Popular Posts

Follow me on Instagram

[instagram-feed]
Friends of Pfister You blog. You Profit. Sign up for SocialSpark!
“Blooming Homestead is a participant in the Amazon Services LLC Associates Program, an affiliate advertising program designed to provide a means for sites to earn advertising fees by advertising and linking to amazon.com."

Copyright © 2025 · glam theme by Restored 316

Copyright © 2025 · Glam Theme on Genesis Framework · WordPress · Log in

  • Home
  • Privacy Policy