• Home
  • FAQ’s
  • Contact
    • About Me
    • Policies
      • Privacy Policy
      • Disclaimer Policy
      • Terms & Disclosures
  • Privacy Policy
  • Terms & Disclosures
    • Facebook
    • Google+
    • Instagram
    • Pinterest
    • Twitter
    • YouTube

Blooming Homestead

  • Gallery
  • DIY/Crafts
  • Home Decor
  • Recipes
    • Breads
    • Desserts
    • Dips/Appetizer
    • Main Dishes
    • Soups/Sandwiches
  • printables
  • holidays
    • Valentines
    • St. Patrick’s Day
    • Easter/Spring
    • 4th of July
    • Halloween
    • Fall/Thanksgiving
    • Christmas
  • Organization
    • Home Binder Printables
    • Printable Calendars
    • Cleaning Tips & Tricks
    • Organization Tips

DIY Thankful Sign

in DIY/Crafts, holidays, Home Decor, Thanksgiving on 02/11/15


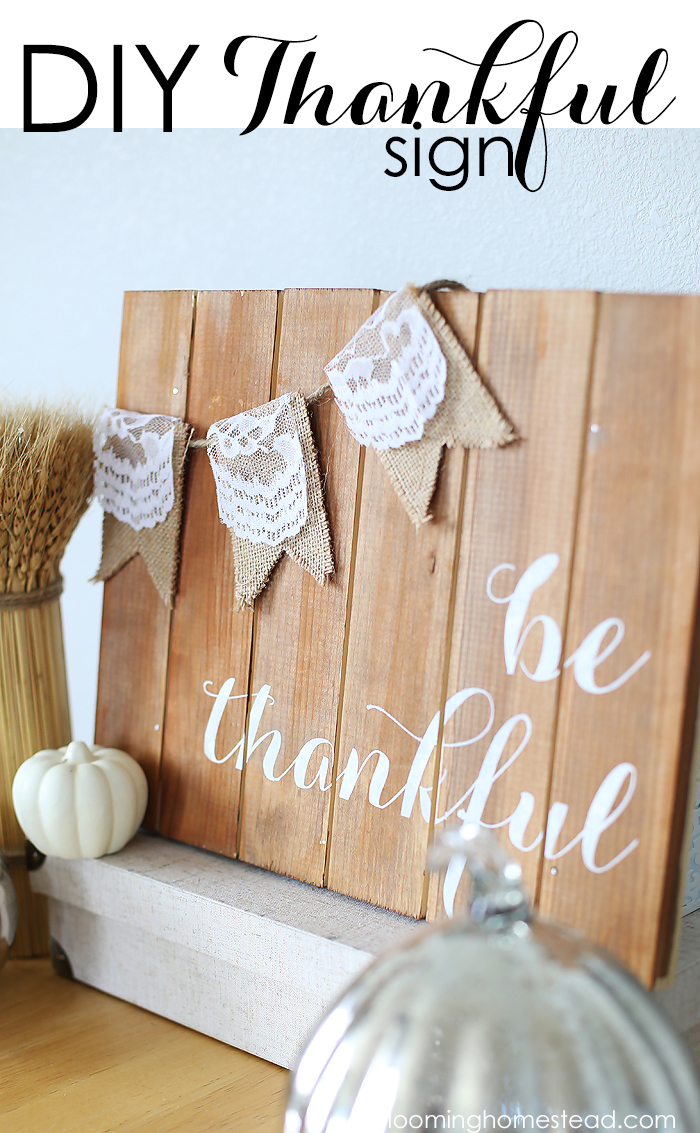
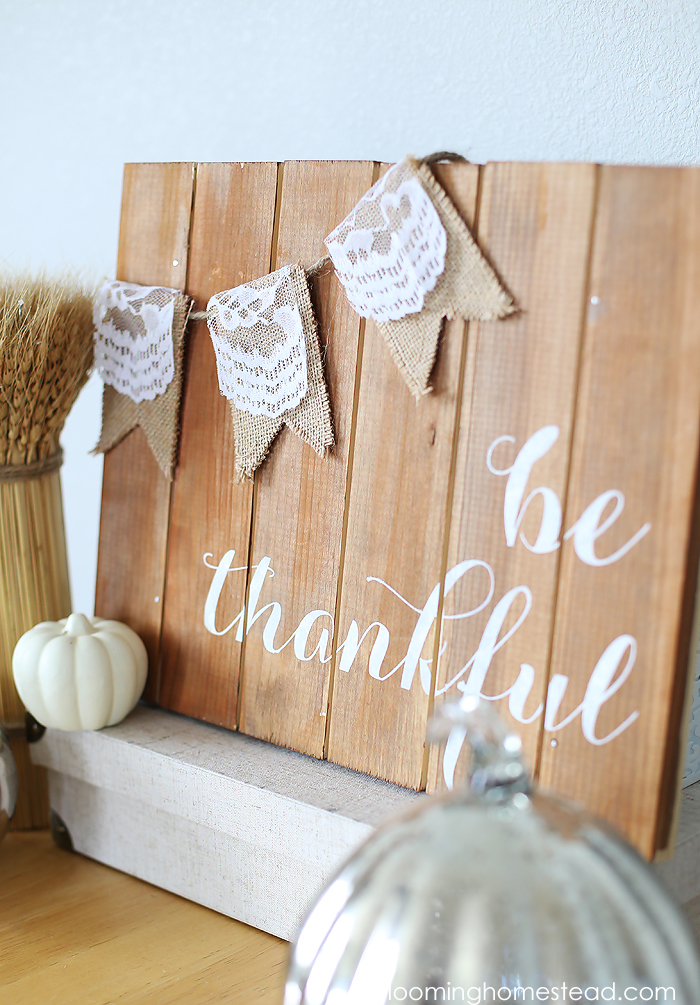
As Thanksgiving is a few weeks away, this time of year we often reflect on the many blessings we have in our lives. This DIY Thankful Sign is a fun reminder of the season and ways we can find joy in sharing gratitude. 

Super easy and pretty be thankful sign tutorial

SUPPLIES:

  • 1×2 wood strip, cut into 8- 1 foot length
  • wood stain
  • nails/liquid nails
  • cardboard cut into strips as spacers
  • burlap cut into pennant shape
  • lace
  • 2 feet jute
  • white paint
  • craft cutting machine and self adhesive vinyl
  • glue gun & sticks

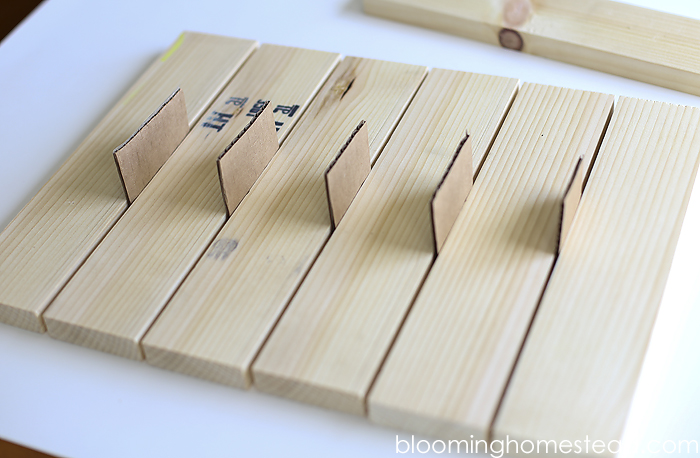
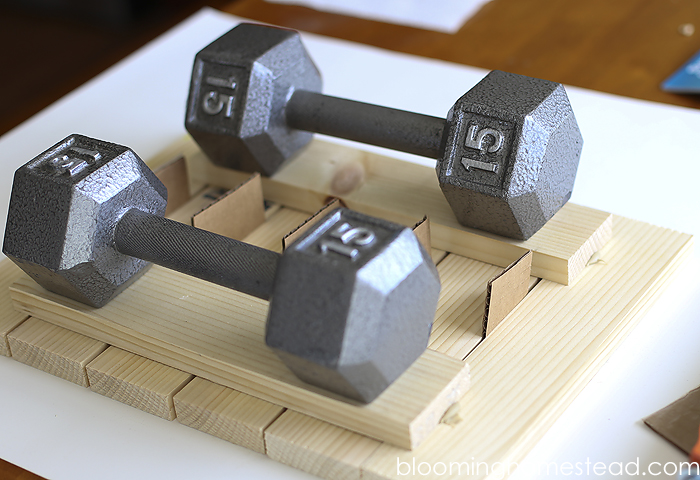
First off you’ll want to make your “pallet” wood base. You can purchase similar style wood bases at the craft store or you can create your own as I did. You’ll get a 1×2 wood strip and cut it into lengths of 1 foot each. Next you’ll place 6 strips together with cardboard as spacers. Using liquid glue and/or nails place two strips on both sides (on back). Since I don’t have a nail gun, I used weights to hold it down as the glue dried then I added nails.  Now you can stain your wood and be prepped for painting.

Super easy and pretty be thankful sign tutorial

Super easy and pretty be thankful sign tutorial

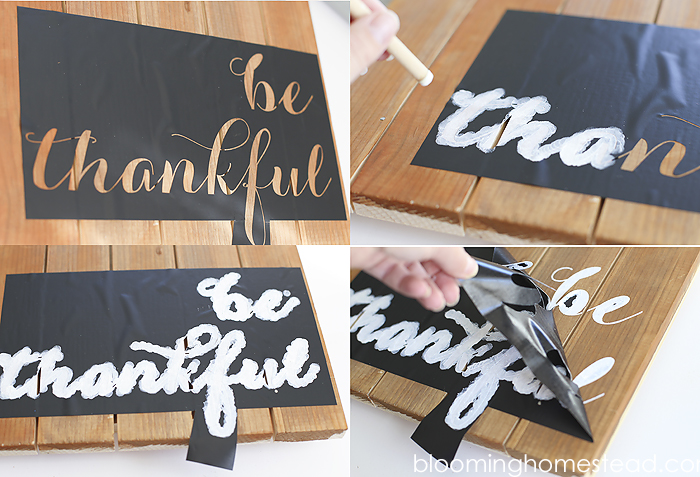
Now you can either stencil or freehand on the “be thankful” to the wood. I chose to cut out a stencil using my silhouette with self-adhesive vinyl. If you cut out your stencil with vinyl, use transfer backing to adhere stencil to the wood.

Super easy and pretty be thankful sign tutorial

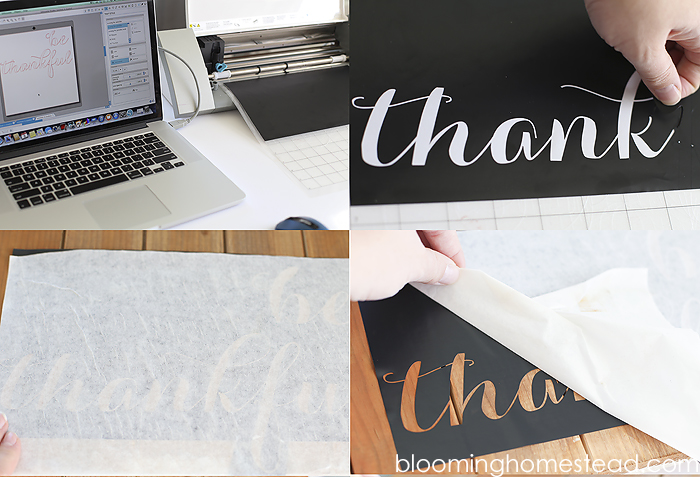
Press down the vinyl to make sure that there is minimal paint bleeding. I use a paint dauber and lightly pat the paint over the stencil. When you get it all painted you’ll be ready remove the stencil.

Super easy and pretty be thankful sign tutorial

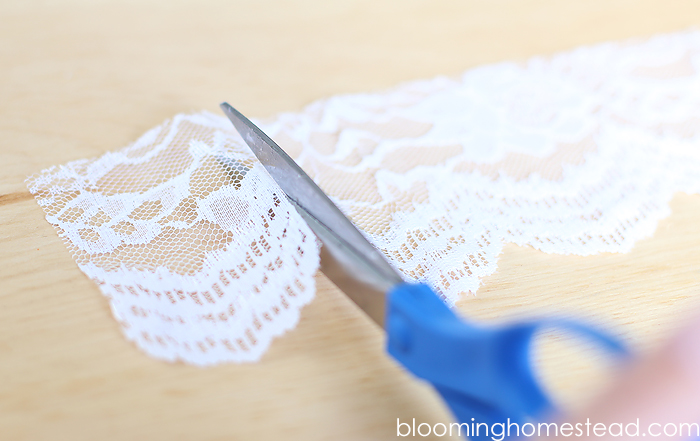
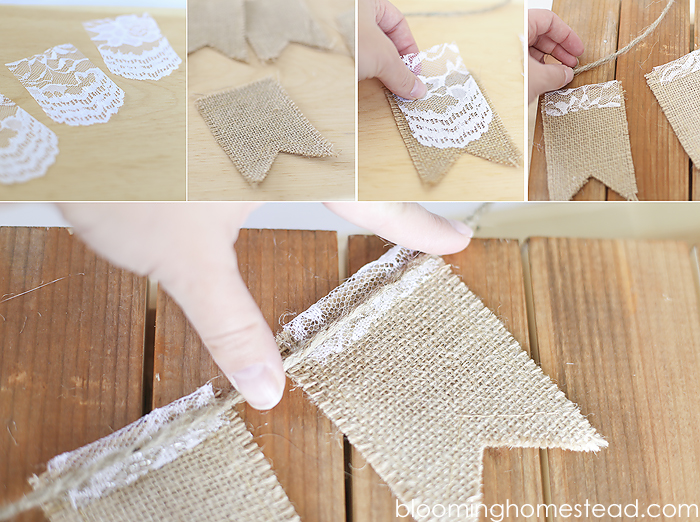
Now you can make the cute burlap lace banner to finish off the look. Cut the burlap into pennant shapes (I purchased mine pre-cut with the edges sewn from the craft store.) Now you cut strips of lace to fit over the banner. I love this scalloped lace and it added such fun detail.

Super easy and pretty be thankful sign tutorial

Now you can overlap the lace over the burlap and hot glue it to jute to complete the banner.

Super easy and pretty be thankful sign tutorial

Super easy and pretty be thankful sign tutorial

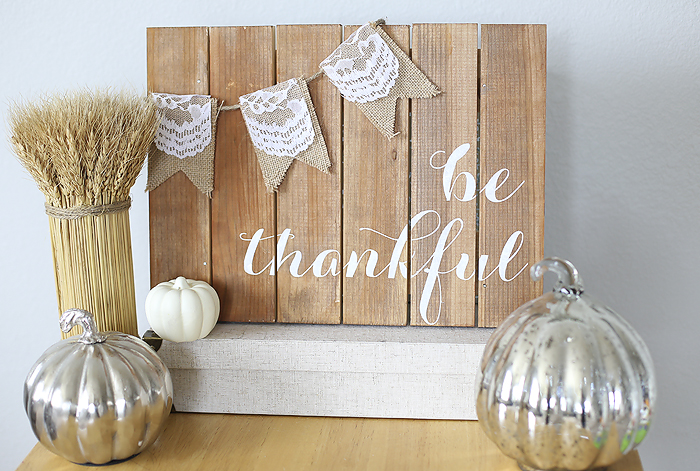
And now you have a beautiful message of gratitude for your home.

Super easy and pretty be thankful sign tutorial

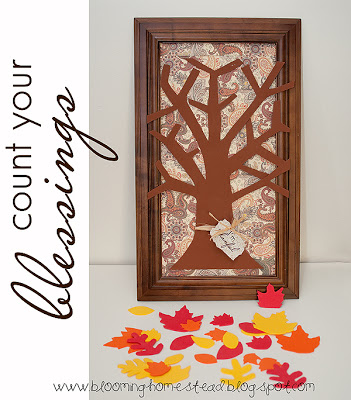
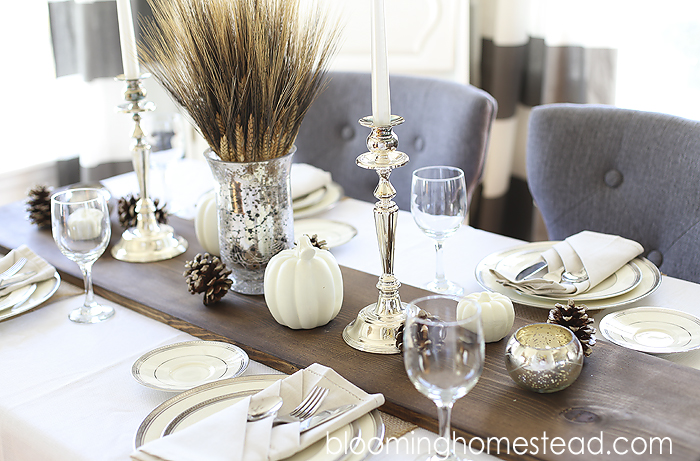
Check out these other fun ideas:

DIY Thankful Tree

Thankful Tree

Harvest Print by Blooming Homestead

Harvest Printables

DIY Wood-Table-Runner

DIY Wood table runner

Originally post on I Heart Nap Time 10/18/14

5 Comments

About Marie

Marie is the author of Blooming Homestead and loves to share her latest home decor ideas, crafts, recipes, home organization tips, and diy projects.

« Creative Collection Link Party
DIY Ornaments »

Comments

  1. Shonee says

    November 4, 2015 at 10:34 pm

    Marie, this is so pretty! I love wood projects and this tutorial you did is so straight forward and easy to understand. This is an easy project that has a big impact! I ,I’ve little burlap and lace banner. I can’t wait to try it out. Thanks for sharing!

    Shonee
    Http/:: http://www.hawthorneandmain.com

    Reply
    • Marie says

      November 8, 2015 at 11:03 pm

      Awe, thanks so much Shonee! Yes, I am all about easy projects. 🙂

      Reply
  2. Angela says

    November 28, 2015 at 12:21 am

    I absolutely love this! I am also loving the font you used for “be thankful” would you be willing to share the name? Can’t wait to make one of my own!

    Reply
    • Marie says

      December 1, 2015 at 2:50 pm

      You are so welcome! I believe it is the Carolyna Pro paid Font.:)

      Reply

Trackbacks

  1. Homemade Christmas Gifts - For Her (Part 4) - Eat Pray Create says:
    November 28, 2015 at 12:13 am

    […] Be Thankful Sign – You could write anything on this sign… like “Be Grateful” or “Families are […]

    Reply

Leave a Reply Cancel reply

Your email address will not be published. Required fields are marked *

Welcome! I'm Marie an avid crafter with a passion for home decor and organization! I am so glad you are here!

  • Facebook
  • Google+
  • Instagram
  • Pinterest
  • Twitter
  • YouTube

Popular Posts

Follow me on Instagram

[instagram-feed]
Friends of Pfister You blog. You Profit. Sign up for SocialSpark!
“Blooming Homestead is a participant in the Amazon Services LLC Associates Program, an affiliate advertising program designed to provide a means for sites to earn advertising fees by advertising and linking to amazon.com."

Copyright © 2023 · glam theme by Restored 316

Copyright © 2023 · Glam Theme on Genesis Framework · WordPress · Log in

  • Home
  • Privacy Policy