• Home
  • FAQ’s
  • Contact
    • About Me
    • Policies
      • Privacy Policy
      • Disclaimer Policy
      • Terms & Disclosures
  • Privacy Policy
  • Terms & Disclosures
    • Facebook
    • Instagram
    • Pinterest
    • Twitter
    • YouTube

Blooming Homestead

  • Gallery
  • DIY/Crafts
  • Home Decor
  • Recipes
    • Breads
    • Desserts
    • Dips/Appetizer
    • Main Dishes
    • Soups/Sandwiches
  • printables
  • holidays
    • Valentines
    • St. Patrick’s Day
    • Easter/Spring
    • 4th of July
    • Halloween
    • Fall/Thanksgiving
    • Christmas
  • Organization
    • Home Binder Printables
    • Printable Calendars
    • Cleaning Tips & Tricks
    • Organization Tips

DIY Winter Woodland Sign

in Christmas, DIY, DIY/Crafts on 19/10/16

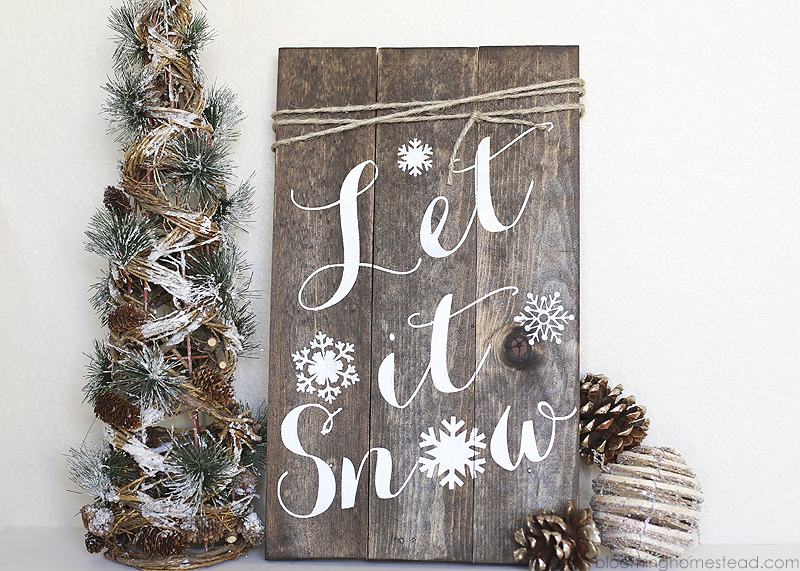
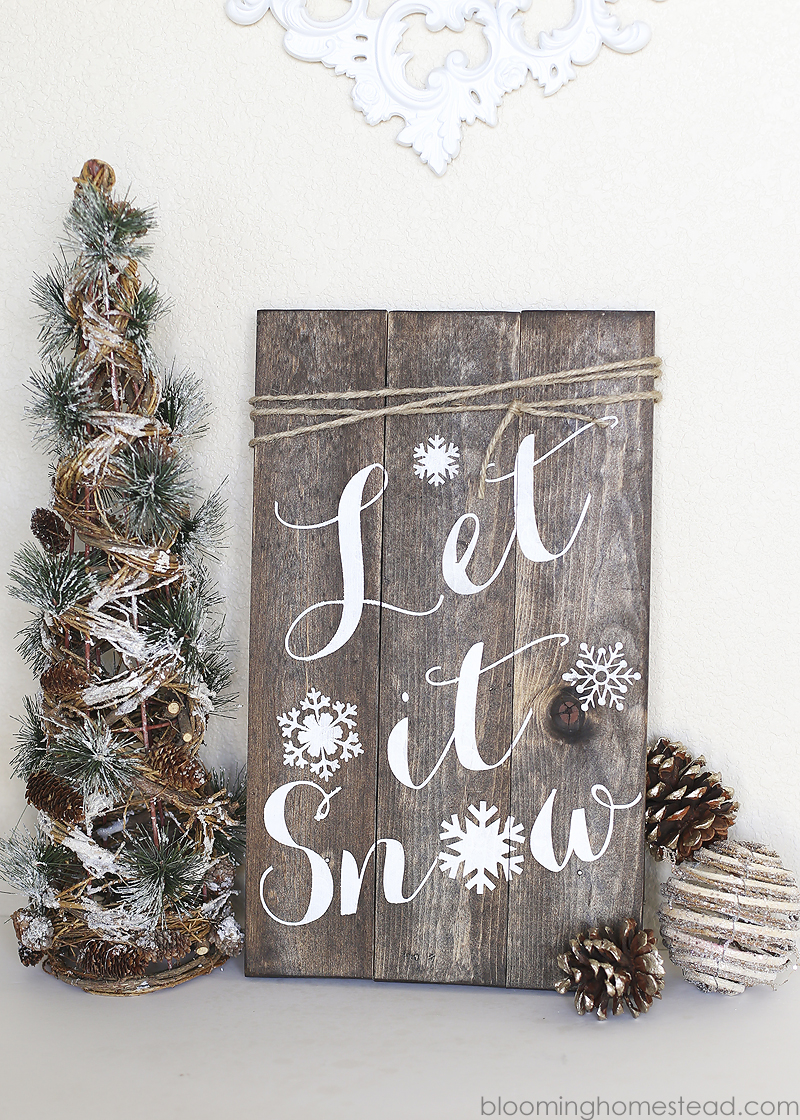
 Are you ready for the holidays? Today I am re-sharing one of my favorite past projects. This pretty DIY Winter Woodland Sign  is one of my favorite holiday projects and is oh so easy to make. I love simple, rustic home decor especially when I can incorporate it into the holidays. I love the rustic touch and I kind of have a thing for diy signs if you couldn’t tell. 🙂
Winter Woodland Sign copy

This sign is super easy and I’m going to show you how to make one of your own!

Here are the supplies you need to make your own DIY Woodland Sign:

  • 1 piece 1 x 3 x 6 ft common wood cut into 3 pieces of 17.5″ lengths each
  • 2 pieces 1 x 1.5 x 10 common wood (for back bracing pieces)
  • hammer and nails or nailgun
  • sandpaper or sander
  • dark walnut stain
  • white acrylic craft paint
  • paint brush
  • stencil
  • poly or sealer
  • 2 yards jute

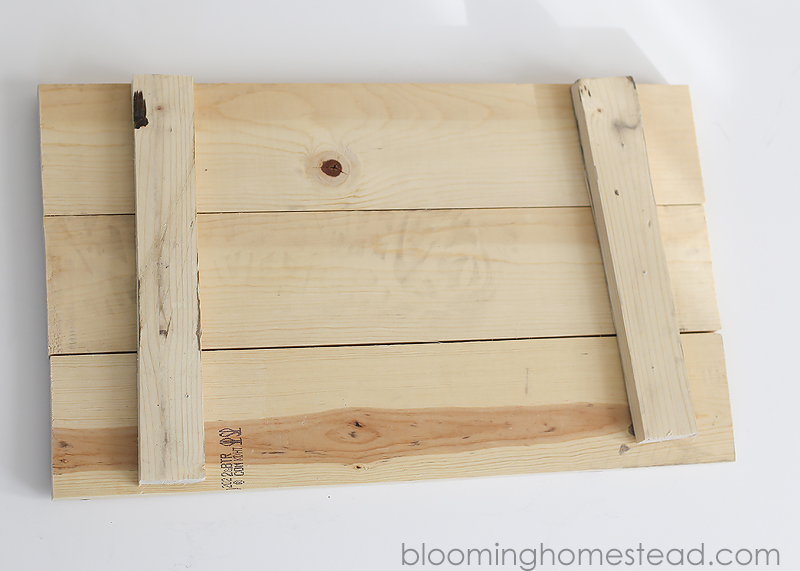
Step 1: To start you’ll want to create your board. I wanted a pieced together look so I chose to nail some boards together. You could also just use a solid piece of wood 30″ wide 17.5″ in length. For the piecing, you’ll take a 1 x 3 x 6ft common board cut into 3 lengths of 17.5″. You’ll also want to have 2 pieces of 1 x 1.5 x 10 to brace as backing. (You can also buy a similar remade board here)

woodland-art-sign

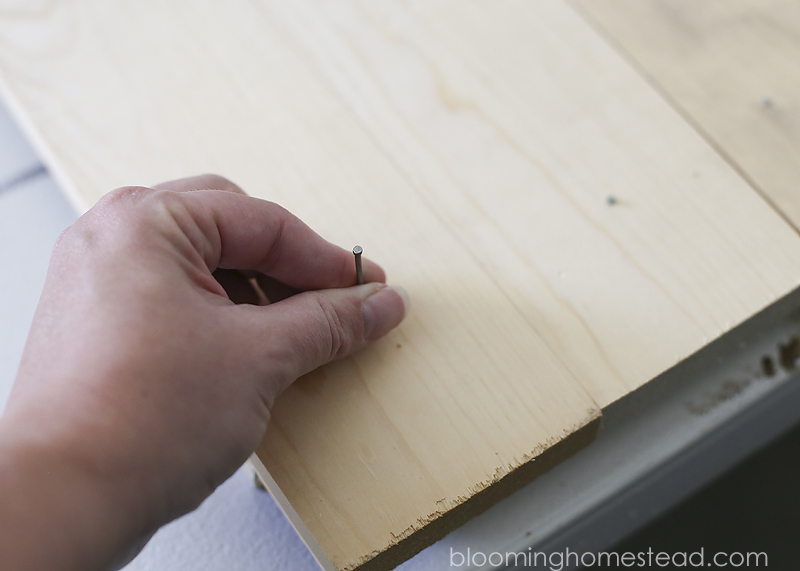
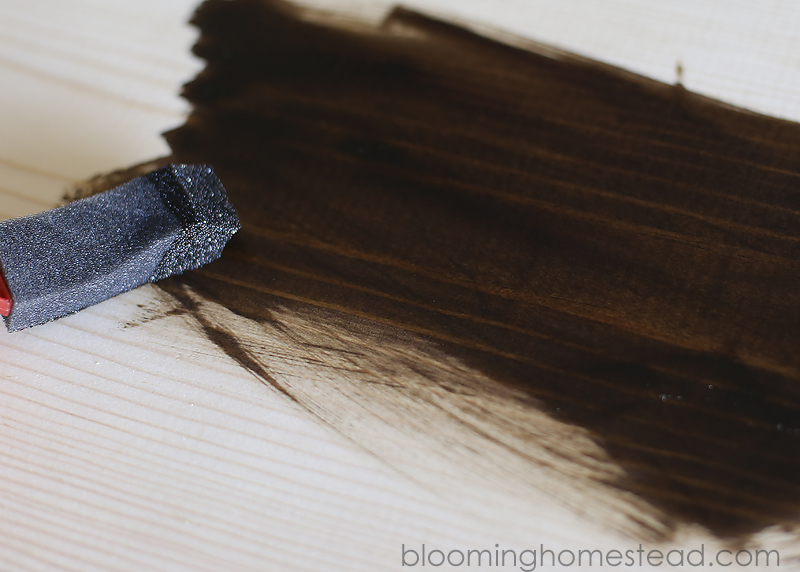
Step 2: Now you’ll nail it together. I used simple flat nails and a hammer to attach it together. After you get it nailed together you’ll want to sand it down and then stain it.

diy-woodland-art1

wood-stain-for-woodland-sign

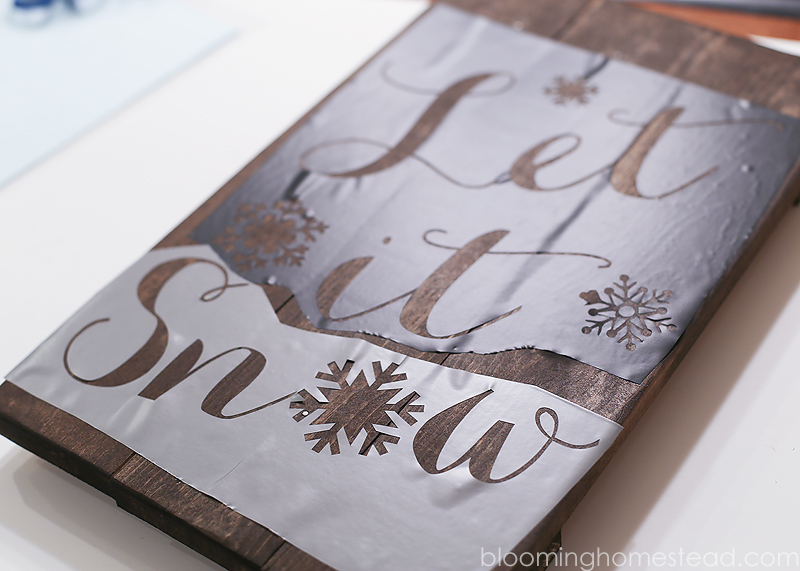
Step 3: After the stain is cured, you’re ready to paint. I am not talented with freehand so I created a (messy) stencil with my craft cutter and self adhesive vinyl. If you don’t have a cutting machine you can try the freezer method for stenciling.

diy-woodland-art-stencil

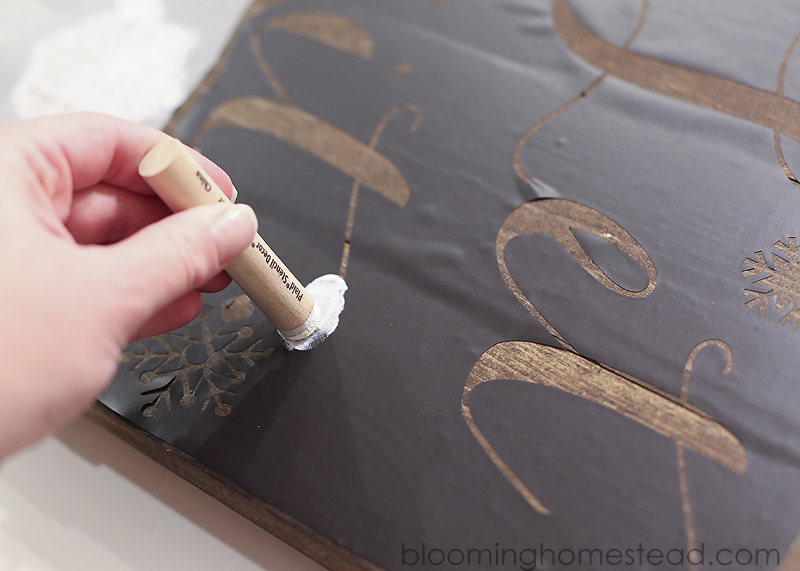
Step 4:  When you have your stencil placed you can start painting. To avoid a lot of paint bleeding it helps to use a paint dauber with a blotting method using a minimum of paint. You can layer it if you need it more opaque.

woodland-art-painting

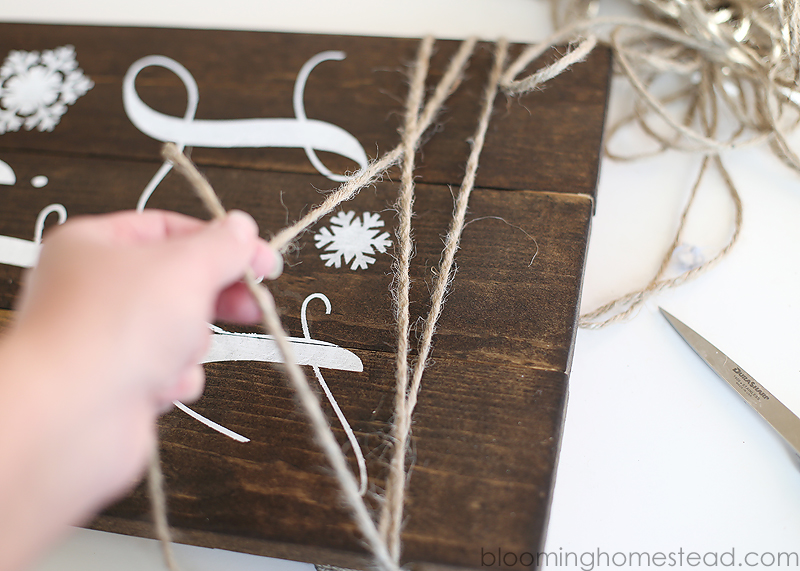
Step 5: When the paint is dry you can remove the stencil and seal your board. Now tie on some jute for a fun rustic touch. Tying jute around the wood adds a rustic touch!And there you have it, a beautiful rustic woodland winter sign.

jute-wrapping

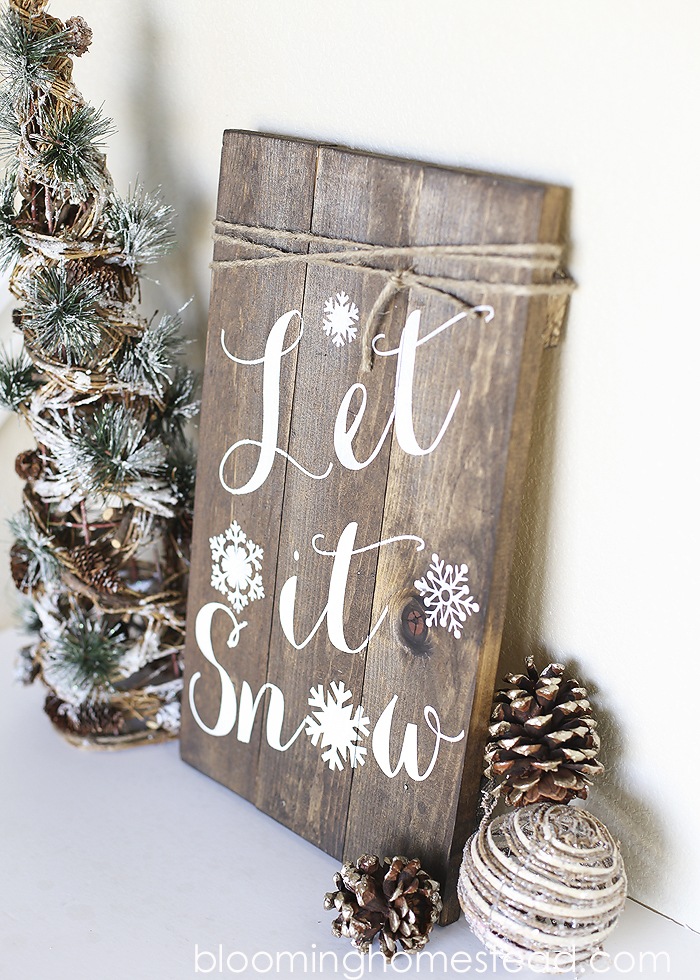
What do ya think? Cute right? I’m pretty much in love with it and I think I might make a few to give as gifts as well. One more reason I love these and they can stay out all winter since they are holiday specific. I get so excited when fall hits about all the fun holidays to decorate for…but usually by the time January hits I’m ready for some decorating stability. 🙂

winter-wood-sign1

My main tool for this project was my silhouette cameo! You can find it here. (affiliate link)

 Silhouette Cameo — Starter Bundle

winter-wood-sign-copy

This post was originally shared on Live, Laugh, Rowe 11/25/14.
24 Comments

About Marie

Marie is the author of Blooming Homestead and loves to share her latest home decor ideas, crafts, recipes, home organization tips, and diy projects.

« DIY Boxwood Topiary
Birthday Candy Shop »

Comments

  1. Janet reed says

    November 30, 2014 at 8:43 am

    Would you mind sharing the fonts you used on this project and the be thankful one? Thanks!!

    Reply
    • Marie says

      December 4, 2014 at 8:47 pm

      Hi Janet, the font I used was Carolyna Pro Black Regular and I just added in snowflakes svg files I purchased from the silhouette store online. Hope that helps. 🙂

      Reply
  2. Dawn says

    December 19, 2014 at 6:01 pm

    Love this sign! Do you have a printable/download availble for it? Thanks

    Reply
    • Marie says

      December 23, 2014 at 9:45 pm

      Sorry Dawn, I don’t have a download available for this.

      Reply
  3. DReNa says

    August 3, 2015 at 12:54 am

    Hi Marie,

    What kind of craft cutter do you use/have and where would one find adhesive vinyl to make the stencil from? I love this project and would like to try it.

    Thanks!
    Drena

    Reply
    • Marie says

      August 13, 2015 at 12:29 pm

      Hi Drena,
      I use a Silhouette Cameo and you can purchase the vinyl from the same company. Just google search for Silhouette America. You can find the machines at craft stores too such as Michaels, Hobby Lobby etc. There is also a vinyl shop called Expressions Vinyl that has tons of vinyl to choose from too!

      Reply
      • Drena says

        August 14, 2015 at 12:47 pm

        Thanks for getting back to me.

        May I ask one more question. Do you use the removable or permanent vinyl? I don’t want it to bleed, but I also want to be able to remove it.

        Thanks again.

        Reply
  4. Rosemary says

    October 18, 2015 at 1:13 am

    What kind of wood did you use? Is it stained?

    Reply
    • Marie says

      October 24, 2015 at 11:12 pm

      Hi Rosemary, I used a basic pine from home depot, and I used a minwax stain in dark walnut. Hope that helps!

      Reply
  5. Erin says

    November 10, 2015 at 11:42 am

    What computer system did you use to make this sign? I would love to make one for myself

    Reply
    • Marie says

      November 13, 2015 at 2:07 pm

      Hi Erin, I use a macbook and my silhouette machine to create the stencil for this project. You can find the link at the bottom of the post above for more info.

      Reply
  6. Momina says

    October 22, 2016 at 3:29 am

    Your projects are always so lovely!!

    Reply
    • Marie says

      October 25, 2016 at 9:02 pm

      Thank you so much!

      Reply

Trackbacks

  1. 25 of the Best Christmas Crafts - Crafty Wife says:
    November 25, 2014 at 10:58 pm

    […] Deer Pillow | DIY Woodland Winter Sign |  Wooden Stocking Holder | Thumb Tack Christmas Wall Art | Sharpie Paint Christmas […]

    Reply
  2. Design News / caught my eye + deals 12.19.14 says:
    February 13, 2015 at 7:14 pm

    […] and DEALS! these are the prices when I hit publish, they can run out or change at any time: * Samsonite Luggage Sets — 70% off * Xbox One 500GB Console Bundle with Assassin’s Creed […]

    Reply
  3. Rustic Christmas Inspiration Board! - B. Lovely Events says:
    November 28, 2015 at 6:16 pm

    […] Accent Chair-Charish, Let It Snow Sign-Blooming Homestead, Gold Candleabra- Jay Archer Floral Design, Cinnamon And Evergreen Wrapped Napkins-Vintage House, […]

    Reply
  4. 14 Easy Holiday Crafts To Get Your House Ready For Christmas | Plum And Proper says:
    December 6, 2015 at 6:11 am

    […] 6. DIY Winter Woodland Sign [x] […]

    Reply
  5. Rustic Christmas Signs We Love! - B. Lovely Events says:
    December 10, 2015 at 9:26 pm

    […] {This is the most wonderful Let It Snow Rustic Wooden Christmas sign from Blooming Homestead!} […]

    Reply
  6. 15 Awesome Holiday DIY Decor Ideas - Pretty My Party says:
    December 14, 2015 at 7:58 am

    […] DIY Winter Woodland Sign: Blooming Homestead […]

    Reply
  7. Christmas Styling – Part 3: DIY details that are worth the effort | coco & confetti says:
    December 21, 2015 at 9:37 pm

    […] DIY projects from: Image 1 – Marty’s Musings, Image 2 – Blooming Homestead, Image 3 – How About Orange, Image 4 – A Beautiful Mess, Image 5 – Snow and […]

    Reply
  8. Christmas Styling – Part 3: DIY projects that are worth the effort | coco & confetti says:
    December 21, 2015 at 10:12 pm

    […] DIY projects from: Image 1 – Marty’s Musings, Image 2 – Blooming Homestead, Image 3 – How About Orange, Image 4 – A Beautiful Mess, Image 5 – Snow and […]

    Reply
  9. What To Do With Old Pallets? says:
    December 26, 2015 at 11:06 am

    […] Image via: Blooming Homestead […]

    Reply
  10. Christmas Inspiration - House of Hargrove says:
    December 7, 2016 at 4:00 am

    […] Let it Snow is always playing on the Christmas radio. Make this sign for your mantel or to hang on the wall. DIY Winter Woodland Sign […]

    Reply
  11. 150 Cheap & Easy Pallet Projects - Prudent Penny Pincher says:
    April 17, 2017 at 4:15 pm

    […] Winter Woodland Sign dark walnut stain + white acrylic craft paint + stencils + sealer + jute twine […]

    Reply

Leave a Reply Cancel reply

Your email address will not be published. Required fields are marked *

Welcome! I'm Marie an avid crafter with a passion for home decor and organization! I am so glad you are here!

  • Facebook
  • Instagram
  • Pinterest
  • Twitter
  • YouTube

Popular Posts

Follow me on Instagram

[instagram-feed]
Friends of Pfister You blog. You Profit. Sign up for SocialSpark!
“Blooming Homestead is a participant in the Amazon Services LLC Associates Program, an affiliate advertising program designed to provide a means for sites to earn advertising fees by advertising and linking to amazon.com."

Copyright © 2025 · glam theme by Restored 316

Copyright © 2025 · Glam Theme on Genesis Framework · WordPress · Log in

  • Home
  • Privacy Policy