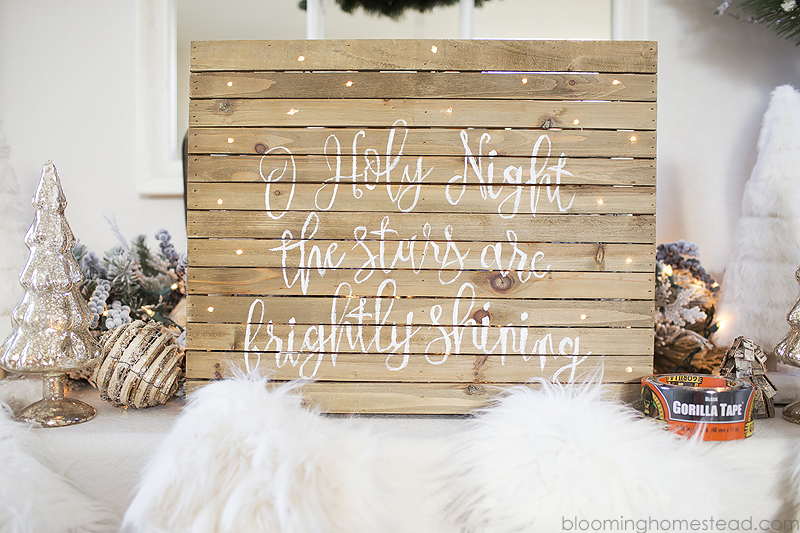
This is a sponsored post written by me on behalf of Gorilla Glue. All opinions are 100% mine. This beautiful DIY Lighted Christmas sign is the perfect way to decorate your home this holiday season. Each year I love to create a few new accessories to add to my holiday decor and this year was no exception. While I love making signs for any season, I wanted to take it up a notch by adding in lights. 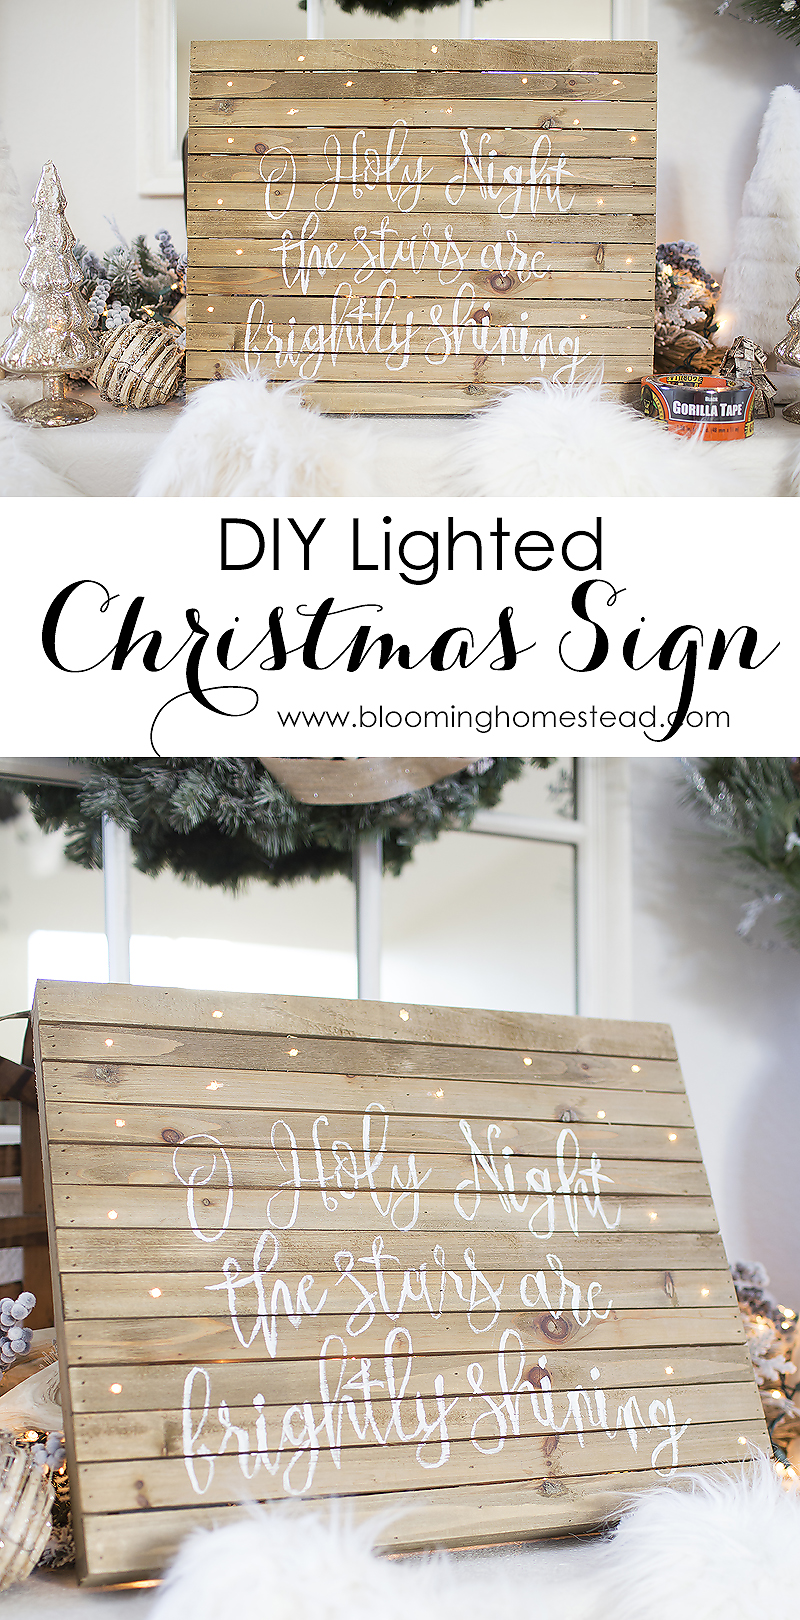 Today I’ll walk you through the process and show you how you can create your own.
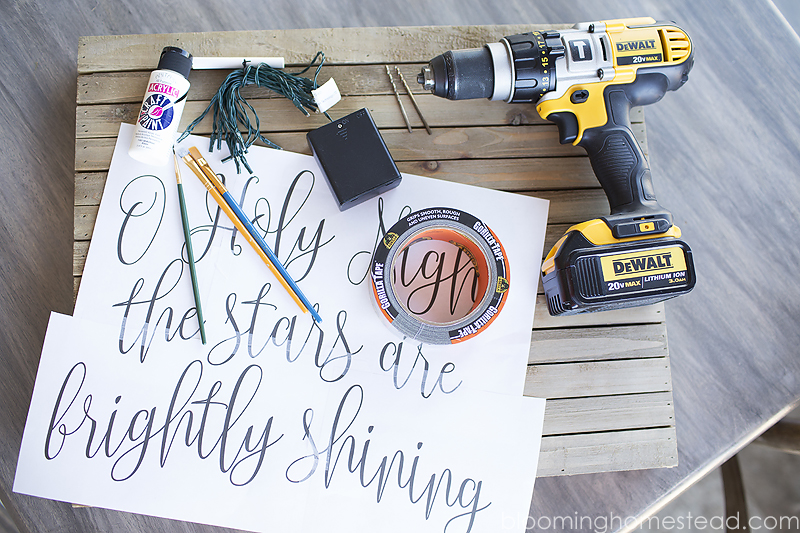
Here are the supplies you’ll need:
- Wood sign (I bought mine at hobby lobby and chose 16×20 size)
- White paint
- Paint brushes
- Chalk
- Pen
- Gorilla Tape
- 20 craft light strand
- Drill
- Printed template (download my template here)
 Step 1: You’ll start by prepping your template. I printed mine in 8.5″x11″ sections and pieced it together. (Or you can take it to a printer and have it printed the size you need.) You can even freehand the text if you like but I needed a little guide. You’ll flip the template over and run the chalk lengthwise all along the back of the template. You want it to have a decent coating.
 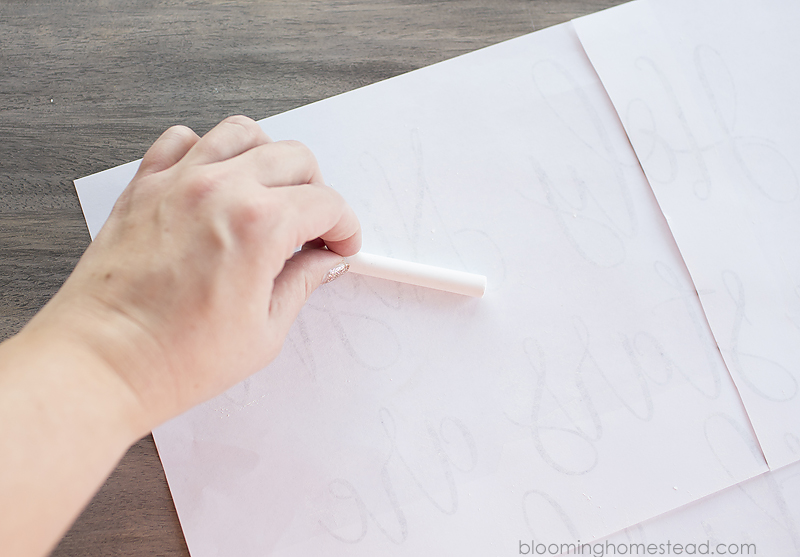 Step 2: After your template is coated with chalk, you’ll trace around the letters. This will allow the pressure from the pen to apply the chalk onto the wood so you’ll know where to paint.
 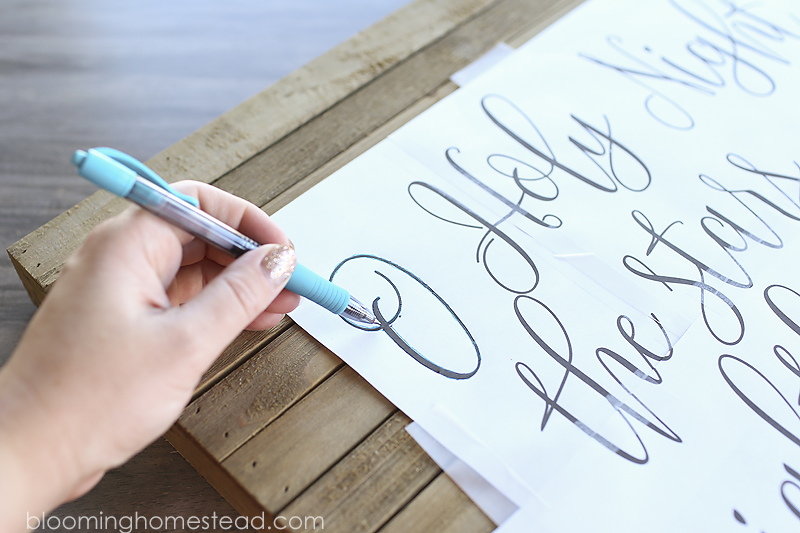 Side note: I started out with the wrong kind of tape and my template kept slipping on the wood. I learned real quickly that using gorilla tape to secure it in place was the way to go. When I put it in place, it didn’t budge and kept my stencil in place until I removed the paper once I was finished.
 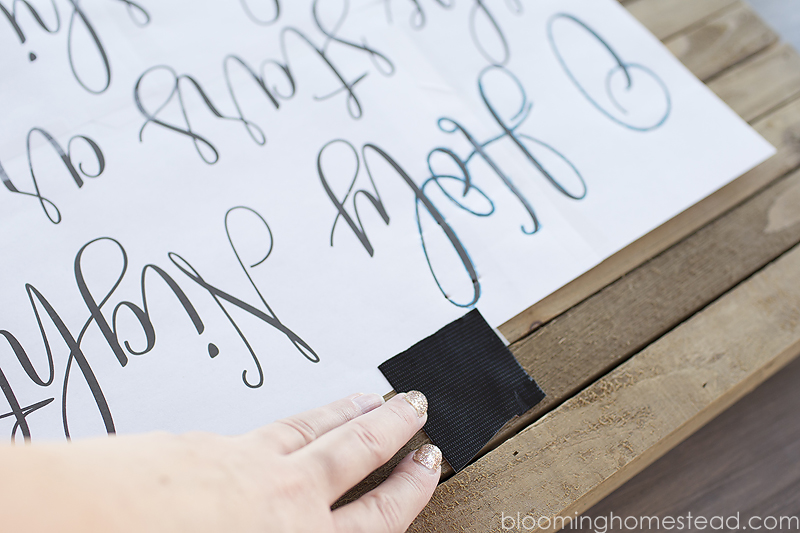 Step 3: Now you remove your paper and you are ready to fill in with paint. I used a variety of paint brushes to fill in the letters. Once your letters are painted and dried, you can use a wet cloth to wipe away any excess chalk residue.
 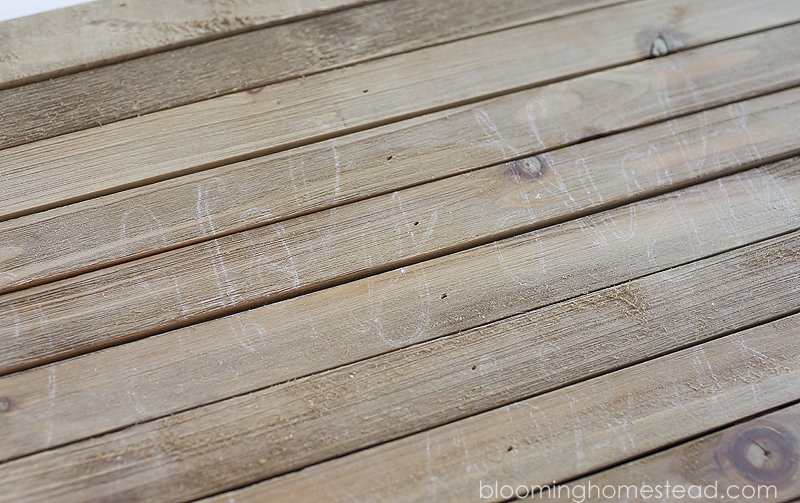 Step 4: Use a drill with a bit to make holes for the lights to shine through. (The drill bit size will depend on the size and style of lights you choose). I chose this 20 strand light from the craft store.
 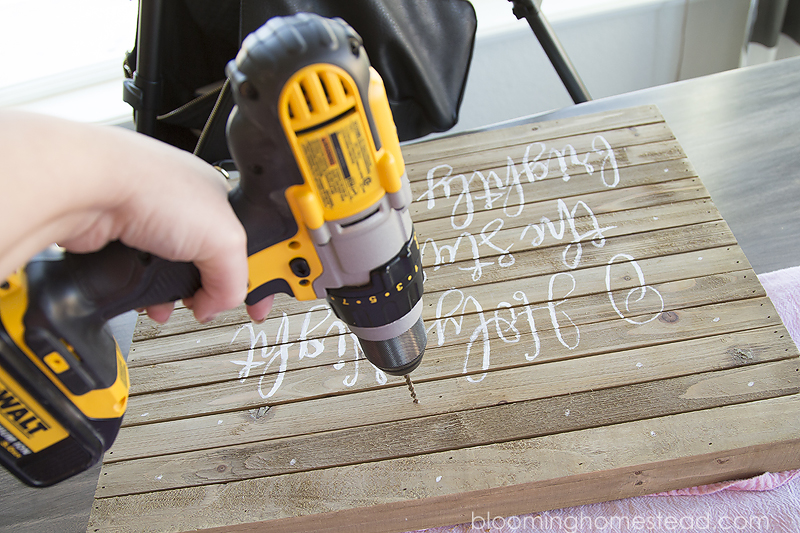 Step 5: Once your holes are all drilled, you can start adding on the lights. Stick them through the holes on the back then use gorilla tape to secure the lights so they don’t budge.
 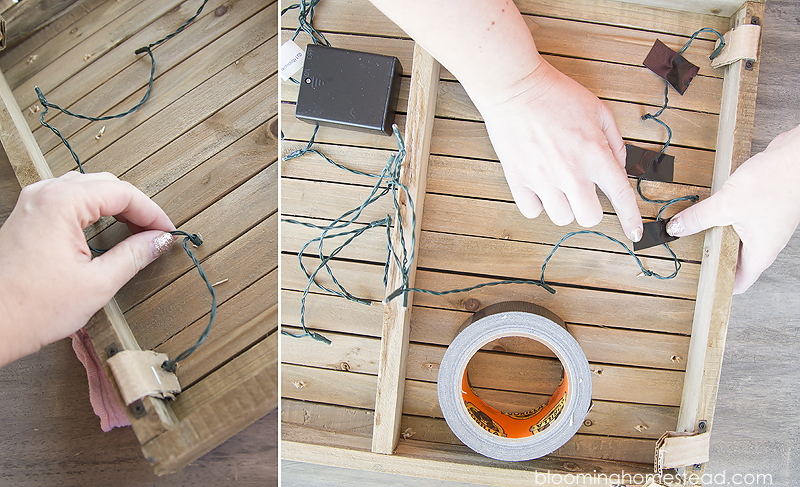 Gorilla tape has double-thick adhesive which makes it ideal to grip smooth, rough, and uneven surfaces such as this rough wood. It is definitely one of those products I often pull out when I am crafting or even doing home repairs. Its rugged, weather-resistant and can withstand moisture, uv rays, and temperature changes. You can purchase it at Home Depot.
 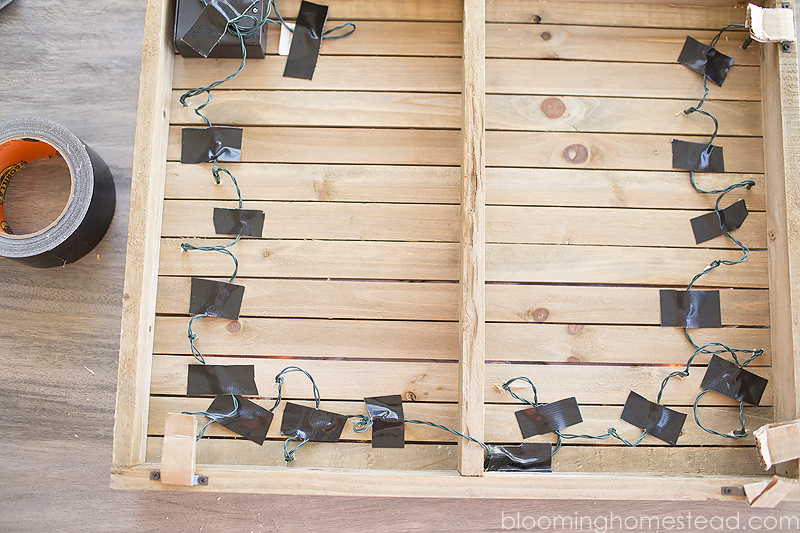 That’s it! A beautiful and unique diy lighted sign that is oh so easy to make and captures the beauty of the season perfectly.
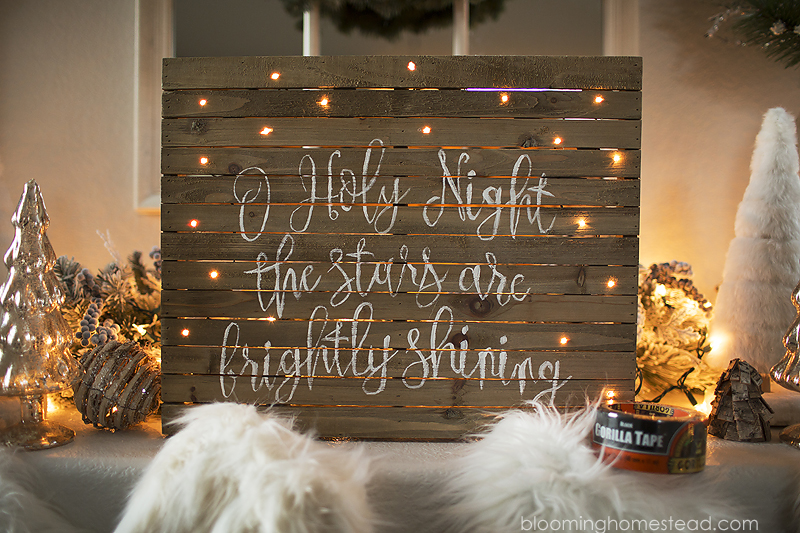
 Make sure to enter to win a $250 Home Depot Gift Card below! Gorilla Tape $250 Home Depot Gift Card Giveaway


Beautiful